
People ask me what kind of gear I use at Retrovoltage for projects. So, here we go:
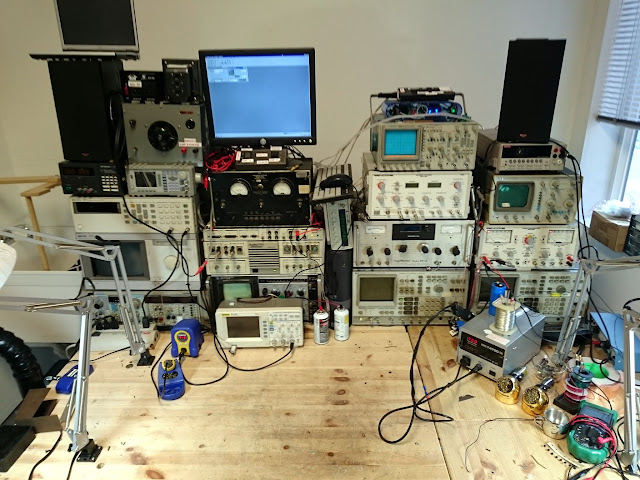
While it’s by no means the best-equipped workbench out there, it has a good mix of lab- and service-grade equipment which can take care of nearly all of my needs. We’ll start in the top left.
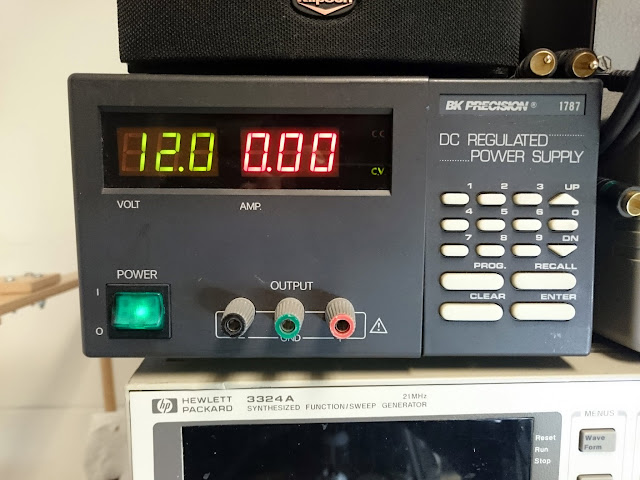
The BK Precision 1787 is a 0-30V, 0-1.5A regulated programmable power supply with constant current and constant voltage modes. I generally use it when working on portable transistor radios, or anything else which takes standard low-voltage batteries to operate, or low-voltage DC. It’s pretty reliable, but doesn’t deal well with back-EMF leakage: when I attempted to use this supply to power a small PAM Class D amplifier module, the voltage would swing around wildly and ultimately trip a protection circuit.
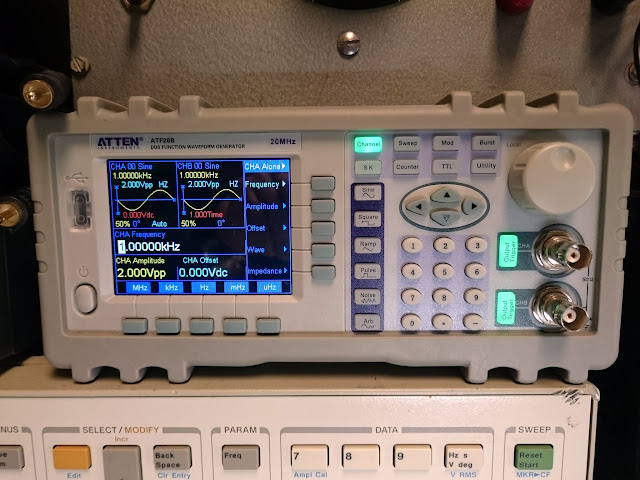
Next is the Atten ATF208 dual-channel 20 MHz function generator. It has sine/square/ramp/pulse/noise options and a number of pre-programmed arbitrary waveforms. It’s fine, although I don’t care much for the user interface, so I don’t really use it that often. It also has a frequency counter built into Channel A, I think.
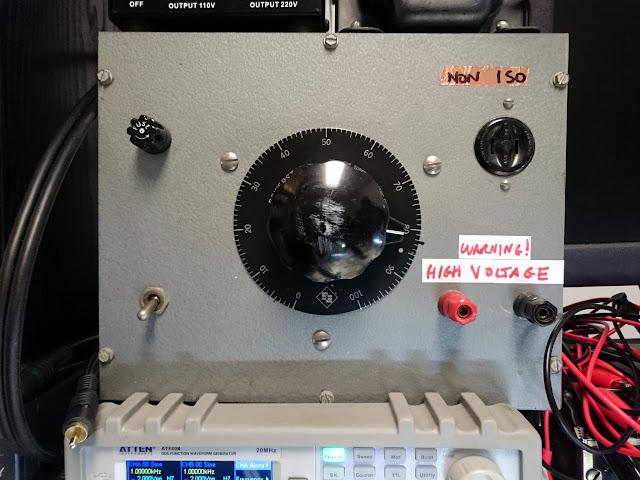
Up top is a 3A variac, with both banana plug outputs and a standard AC port. It’s fused for protection and has a master “off” switch.
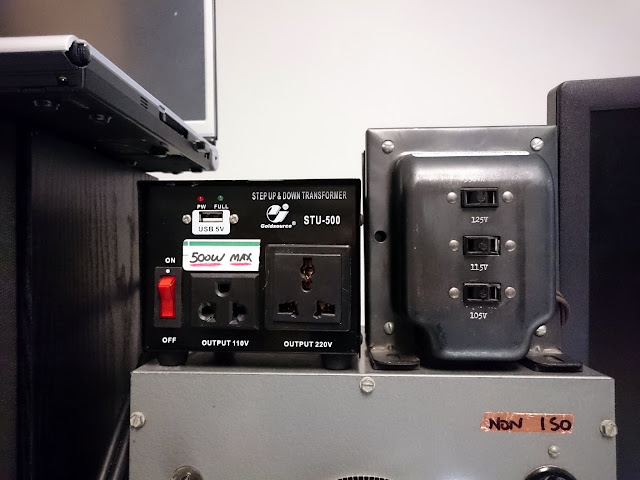
Above the variac is a universal step-up/step-down transformer which accepts all types of plug connctions, on the left, and on the right is a multi-tapped isolation transformer for working on series-string radios.
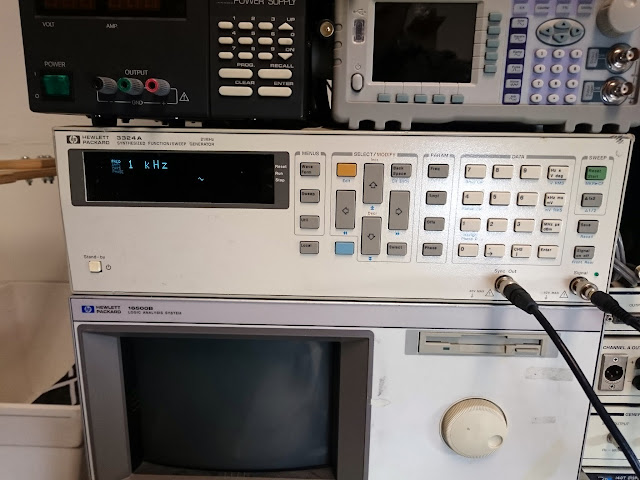
The HP 3324A 21MHz signal/function generator is my go-to for low frequency test signals while debugging, and it’s also a fully capable sweep generator. When hooked to an oscilloscope in XY mode and paired with a suitable detector, you can use the 3324A to align IF passbands. I also use it as a signal source for externally modulating my AM and FM generators. It’s very intuitive to get started, although some of the more complex functions take an awful lot of button presses to set up.
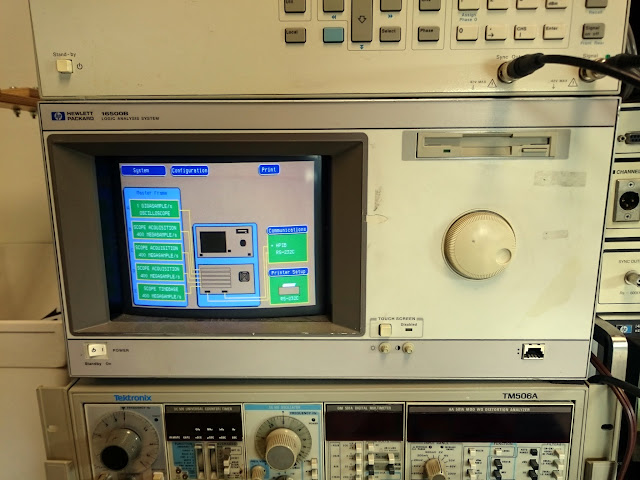
Below is an HP 16500B mainframe, loaded with 6 x 100 MHz @ 400 MSa/s and 2 x 250 MHz @ 1 GSa/s digitizing oscilloscope cards. (I have a spare 100 MHz card, as well, and could reconfigure this to easily be 8 simultaneous 100 MHz oscilloscope channels if needed.) The 100 MHz scope cards aren’t anything special, but the 250 MHz card is my fastest oscilloscope.
Eventually, I’m planning to upgrade this to a solid-state CF card instead of the aging IDE hard drive, and install a 16500H interface module which will provide LAN connectivity for extracting screenshots. I don’t use a 250 MHz scope very often, though, so this is fairly seldom used.
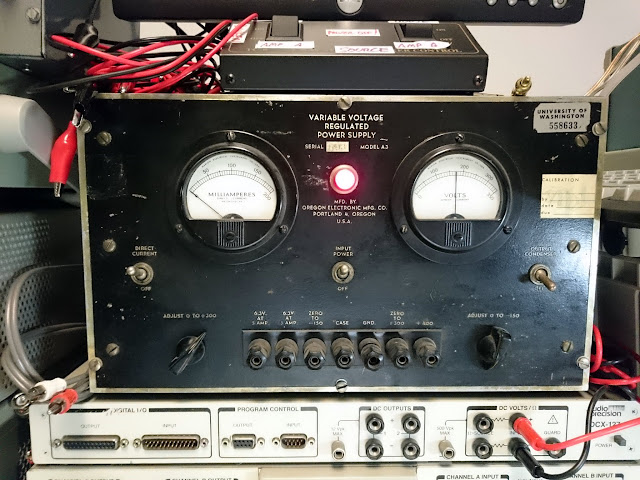
The Oregon Electronics A3 variable voltage regulated power supply is a lab-grade vacuum tube replacement supply. This one was in use at the University of Washington for decades, eventually made its way to a ham radio operator in the Tacoma area, and from there onto my bench after an estate sale. I refurbished it in-house, and it gets used occasionally when I have a radio which needs some power supply troubleshooting. It supplies 6.3V heater voltages at several amps, 0-300V DC at 300 mA and -150-0V bias voltage. I’ll eventually use it to supply heater and stabilized screen-grid voltages with my curve tracer once it’s restored.
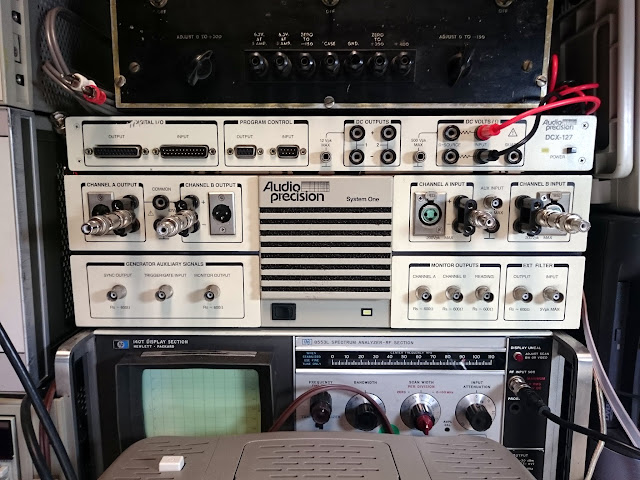
This is probably my most important and most special piece of test equipment, the Audio Precision System One with DCX-127 Multifunction Module. Driven by a Windows 98 PC, this is a complete system for measuring and characterizing audio devices. The gold standard for audio test, this is an incredibly low noise (<0.0007% THD through the audio range), sensitive analyzer for making amplitude, distortion, phase, power bandwidth, and other instruments. Very few if any other repair shops have one of these on their benches, and it makes fantastically detailed graphs. Nothing like an Audio Precision to prove that an amp is working better than it’s factory specs after a full restore.
The multifunction module on top provides a low-current DC voltage source, voltmeter, 4-wire ohmeter, RS232C control inputs and outputs, and a bank of general-purpose digital inputs and outputs which would be useful if I were to connect this to an integrated testing platform, but largely go unused today. It came with the rest of the system, though, so why not?
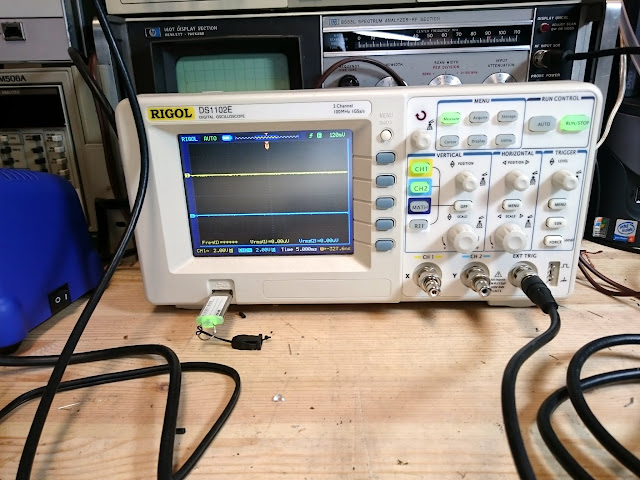
Most commonly when I need a scope is my Rigol DS1102E. Compact and reliable, this sits on my bench in front of the rest of the stack and I use it for quick stage tracing on amplifiers, as well as monitoring waveforms. Through the USB port, it makes nice screenshots for posting, too. Shown here having its sweep triggered by the SYNC OUT on the HP 3324A generator from above.
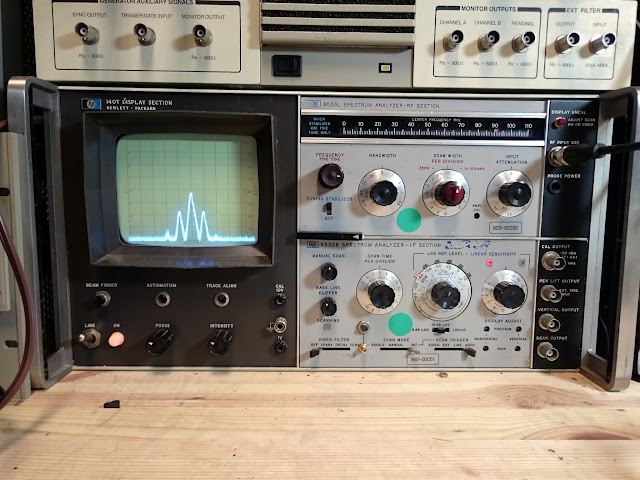
Behind the Rigol is an HP 140T plug-in oscilloscope mainframe, currently loaded with an HP 8553L spectrum analyzer front-end (0-110 MHz) and HP 8552B spectrum analyzer IF section, showing a small section of a frequency modulated signal from an external generator.
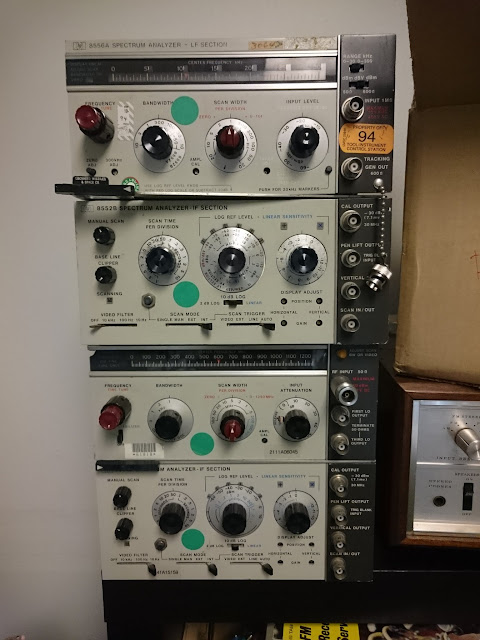
On the shelf, I have two complete additional sets of plug-ins each with their own 8552B IF section: the 8556A LF section, from 0-30 / 0-300 kHz with a 600 Ohm input and built-in tracking generator, and the HP 8554B RF section which is a 100 Hz – 1250 MHz spectrum analyzer front-end. I don’t use either regularly, though: I have a better instrument for audio spectrum analysis, and only once have I needed to work above the top end of the US FM broadcast band.
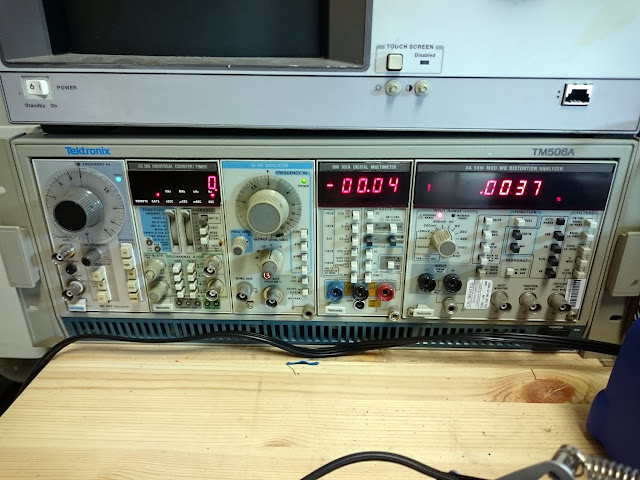
Down on the bottom left is a Tektronix TM506A power mainframe. This one has 6 slots for various Tek plug-in modules. There’s a 4-digit multimeter and a frequency counter, an SG502 low-distortion audio oscillator, and the very rare SG505 Ultra-Low Distortion Oscillator (<0.0009% THD) and AA 501A MOD WQ audio distortion analyzer with filters. The AA 501A MOD WQ is my only analyzer which is capable of intermodulation distortion (IMD) measurements.
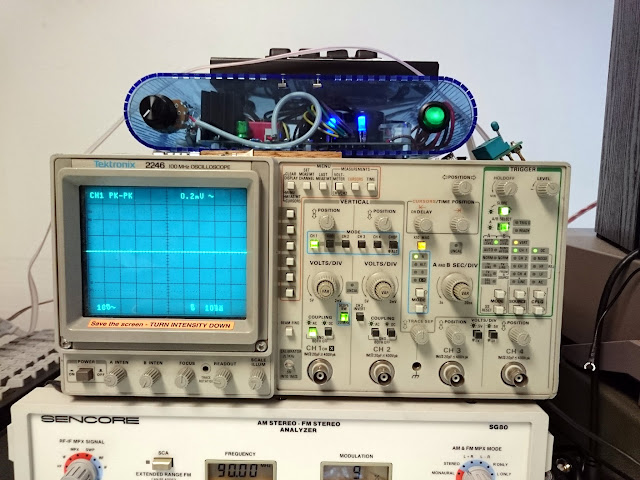
Up top, there’s an analog Tektronix 2246 four-channel, 100 MHz oscilloscope. The first two channels are fully outfitted, but the second two channels offer only a couple of vertical sensitivity options so they’re somewhat less useful. Primarily used as an X-Y display with alignment tools, or to view AM modulation waveforms that aren’t captured well by the Rigol.
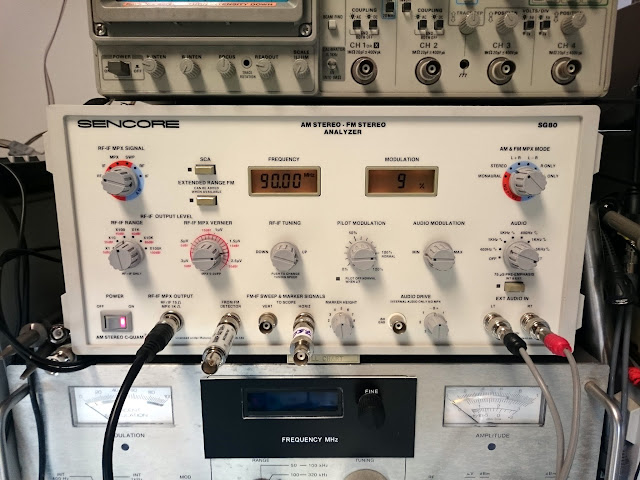
The Sencore SG80 AM/FM Stereo Analyzer is my main tool for alignments. It aligns the U.S. AM and FM broadcast bands, has a calibrated 75-Ohm output, and variable pilot, modulation, and SCA controls. There’s also sweep generator functionality and an internal audio drive. It also offers C-QUAM AM Stereo functionality…which I don’t think is in use anywhere anymore, but it’s nice to know that if someone wanted their oddball AM Stereo receiver aligned to spec, I could do it. This SG80 makes certain assumptions about the receiving bandwidth of the device being aligned, though; precise alignments on some tube and transistor gear could benefit from a bit more flexibility. There’s always a way to get there, but sometimes it’s a little extra work with the fixed settings on the SG80.
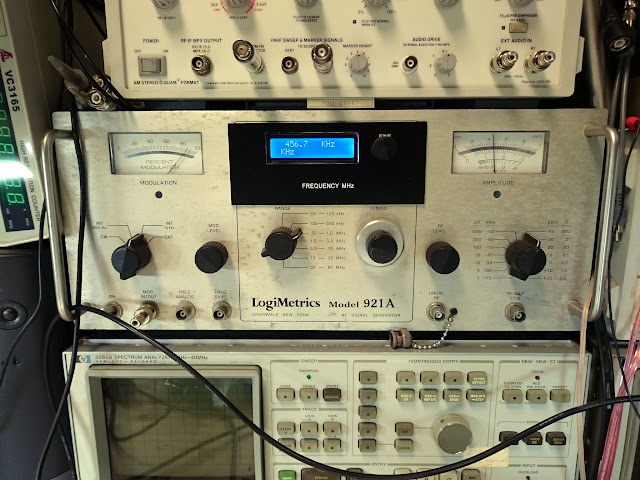
The LogiMetrics 921A is an older lab-grade AM signal generator. Refurbished by a reseller and with the Nixie tube circuitry removed and replaced with an N3ZI Compact Counter, this is a decently stable instrument once it warms up and offers a CW or a modulated signal, variable modulation level, and a calibrated output up to 80 MHz. I use it primarily for aligning shortwave bands on radios.
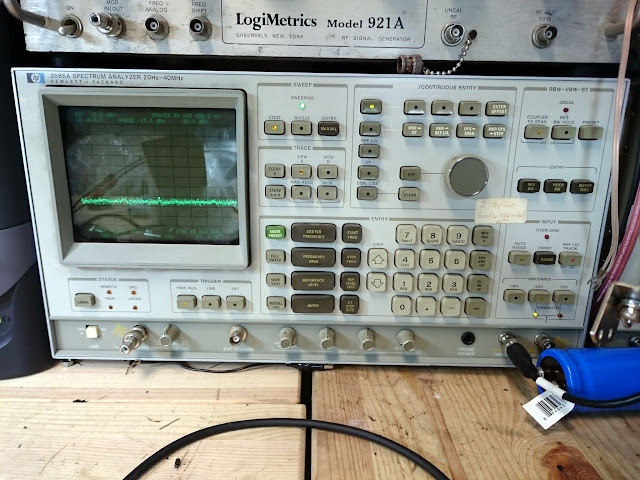
The HP 3585A is my main spectrum analyzer. It’s good from 20 Hz all the way to 40 MHz, so it covers the audio frequencies and most of the shortwave bands. I use it for everything from FM IF passband alignments, FM Stereo audio adjustments (it’s a good visual for removing residual 19 kHz pilots and tuning various traps) and similar. It’s connected to my computer with a USB-GPIB adapter which I use to pull screenshots for publication. There’s also a second, identical unit to the right. This one has a high-stability 10 MHz reference installed; the other has the standard reference and also one of the RF relays has gone high resistance which causes it to fail automatic self-calibration on some settings. I may fix the second one at some point, or I may use it as parts for this working one if it comes to that.
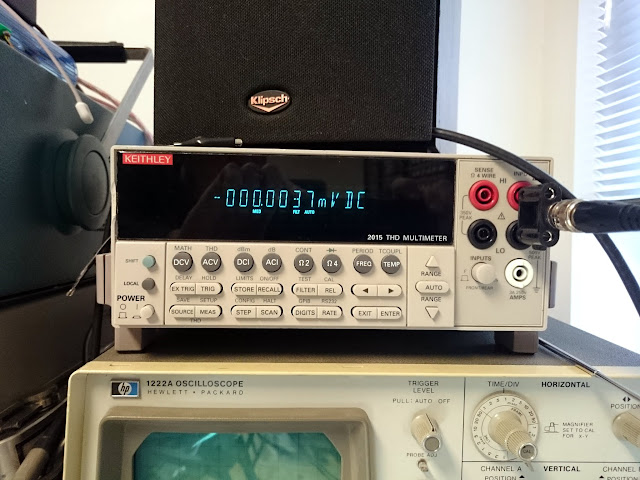
Top right is the Keithley 2015 THD Multimeter. This 7.5-digit bench meter is very, very sensitive and offers all the good features including averaging, 2- and 4-wire Ohms measurements, and AC and DC voltage and current measurements. It also contains a fully functional low-distortion signal generator, and THD analyzer offering THD and THD+N capabilities. The internal signal source is pretty good, although the AP is about 20x better. The analyzer, however operates standalone from any external source. I use this primarily when doing alignments by distortion analysis, such as FM, more than characterizing amplifiers. Before the AP, though, I’d take a dozen readings and plot them on a chart by hand.
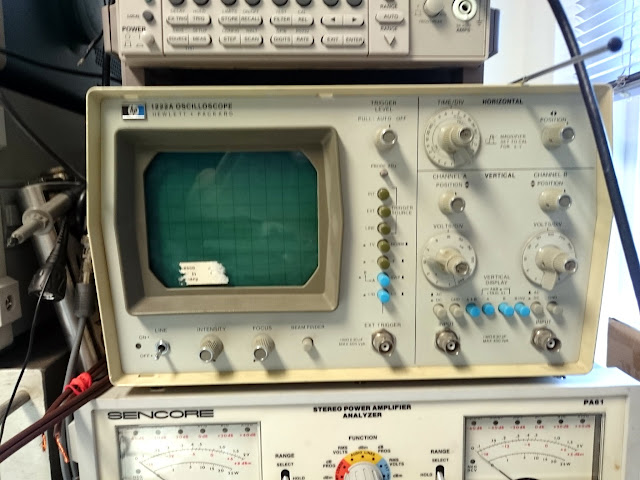
The HP 1220A dual-channel oscilloscope gets used as a waveform monitor attached to the analyzer below it. The CRT is getting very weak, though – it needs to be turned up to maximum intensity to be visible at all. I’ll probably replace it with a different scope soon.

The Sencore PA81 Stereo Power Amplifier Analyzer is one of my most useful tools. It’s a set of switchable stereo meters, 4/8/16/32 Ohm 100W RMS / 250W intermittent dummy loads, 10K terminated RCA line inputs, external inputs for use as two sensitive analog meters, and oscilloscope outputs. It’s perfect for measuring power and sensitivity of amplifiers, and the relative measurement functionality and scales marked in dB make it perfect for FM stereo separation adjustments.
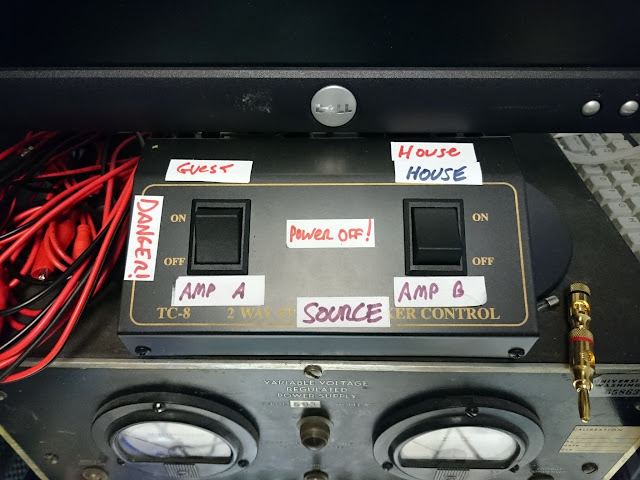
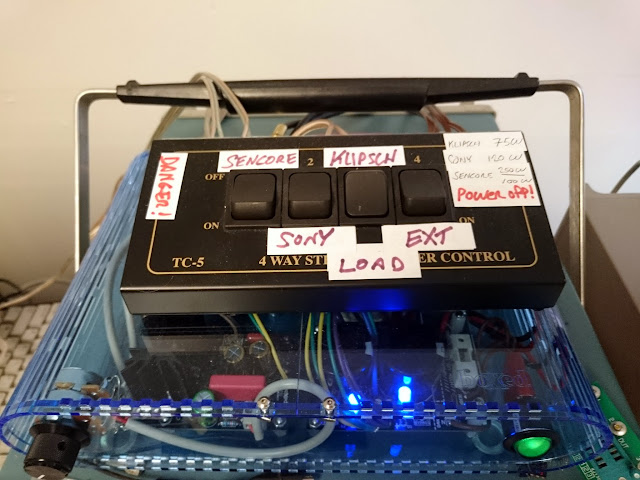
Finally, there’s some switch wiring to decide whether the audio chain should be powered by the bench amplifier (blue) or a “guest” amplifier, and whether that signal should end up going to the Sencore PA81, the Klipsch bench speakers, or to a set of terminals for external speakers.
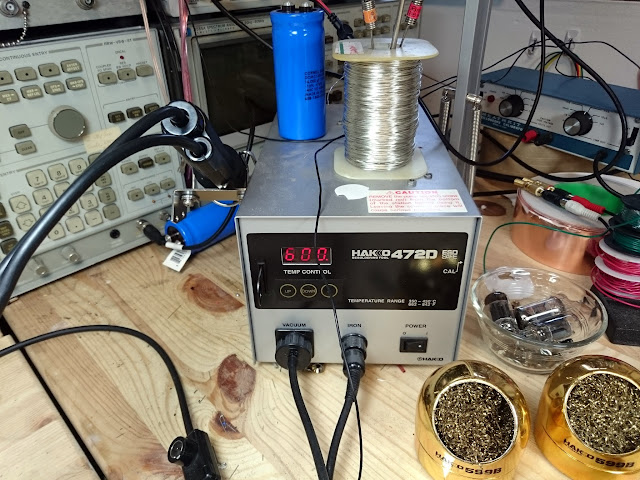
One of the best investments, was my Hakko 472D de-soldering station. This benchtop vacuum de-soldering pump comes with a pretty steep pricetag but makes de-soldering, and especially PCB work, a breeze.
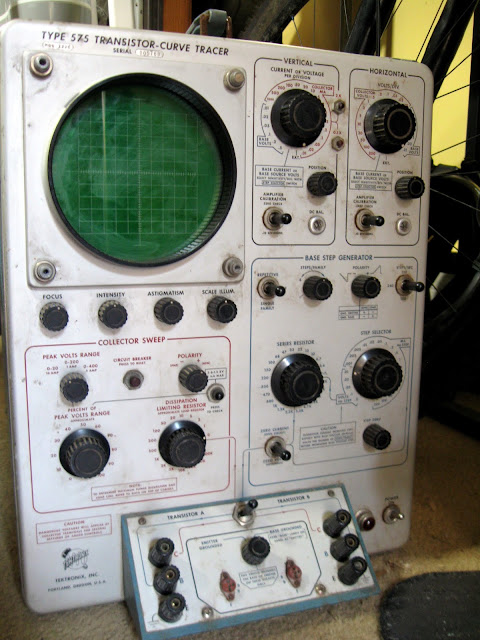
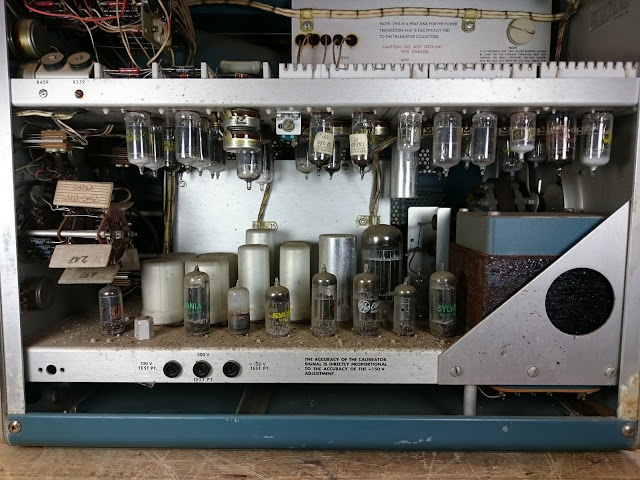
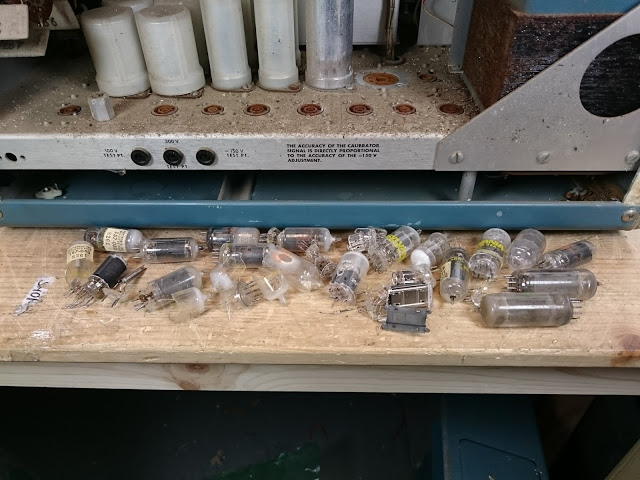
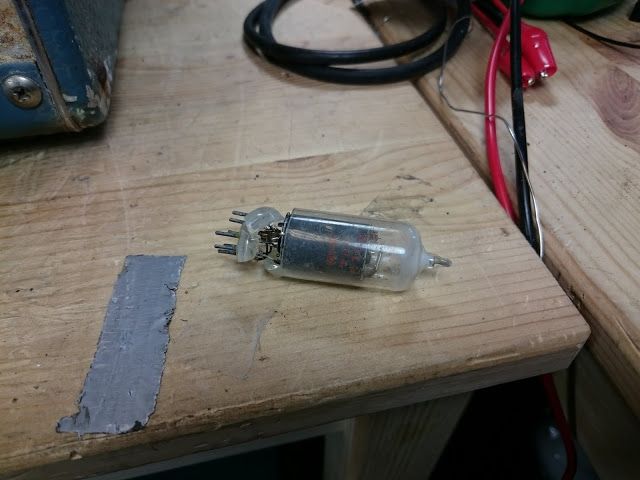
And that’s it! I do have several pieces of other test equipment lying around, but not in a usable state. Maybe that will change some day if I find time between Rain City Audio projects. There’s a Hitachi scope that might be a good candidate for replacing the HP, but behaves nonsensically with some combinations of settings. There’s a Leader FM Stereo signal generator which offers a bit more control than the Sencore, but suddenly developed a fault which trips the protection crowbar as soon as it’s powered on. There’s the Tek 575 curve tracer. There’s an HP 143A oscilloscope mainframe – a version of the 140T mainframe shown above, but featuring a massive 15″ CRT, and enough plugins to make a dual-trace, single-ended X-Y display, a differential input single-channel X-Y display, or a 15MHz oscilloscope. And there’s an HP 140C rack circle-screen oscilloscope.
What’s on your bench?


Merry Christmas from Retrovoltage!
Radio & Television News, December 1954
Share this: