Updated: June 2026 Original: September 2014
A few people have asked me variations of “What tools do I need to fix my first radio?”, and it’s not as simple of a question as you might think. There’s a lot of equipment out there, and if you’re starting out it’s not always easy to tell what’s good from what’s garbage. Picking the wrong tool for the job will give you a frustrating repair experience at best, and that’s no good.
Even though a bench like mine has a mountain of specialized equipment, you really only need a few things to get started for simpler projects like a vintage tube radio, and only a few more if you’re going to be working on equipment with circuit boards – and you can get started for under $200.
Overview
When you’re fixing gear, you’re probably doing one of these things: checking to see what’s broken, removing a broken component, replacing a broken component, and doing some basic testing. This boils down to: a soldering iron, a multimeter, a wire clipper and wire stripper (or a combination tool), and some basic safety gear.
If you’re planning to get into the hobby more deeply, or even just have more than one or two projects queued up, it’s worth investing a little bit of money to get something nicer than the absolute cheapest options out there. But it’s absolutely not required.
Below are some tools which will help you get through your first successful repair and then some. As always, make sure you’re comfortable with the work you’re doing and with how to use your tools before starting a project – any work you do is always at your own risk!
Soldering Iron
Probably the most important item on this list, you’ll use the soldering iron to make connections between wires and components. You need to make sure you get an iron that will be durable enough, and produce enough heat, to quickly melt the solder and heat up joints without taking too long and causing “heat soak” which can damage other near-by components you’re not actively working on.
While it might seem counter-intuitive, too small of a soldering iron is actually a bigger problem than too big! Don’t go crazy, though, an extremely thick tipped 500W iron meant for plumbing work isn’t going to work well for replacing tiny component leads. And you want a real, AC-powered soldering iron or soldering station here: “cold heat” battery-powered devices are outright ineffective for this type of work (and might damage something due to the way they operate based on flowing electricity and not heat), and gas-powered soldering irons don’t offer much in the way of heat control or aren’t great to use indoors.
You have a few options:
- An incredibly cheap, off-brand offering — which still has digital temperature control — can be had for about $10. You’ll want something to hold it with when it’s running, though, as this doesn’t come with a stand. There are dozens more like it on Amazon. I’d avoid using this one for anything other than an old radio, though, as it’s powered directly by AC mains and so could risk damaging more sensitive equipment
- I recommend, at a minimum, stepping up to something which includes a stand and a cleaner. You can get these in the $40-60 range, and often come with extra tips and accessories that will be just fine for your first few projects.
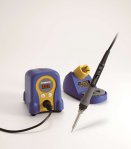
- I use a Hakko brand professional-grade soldering iron myself. Hakko was founded in 1952 in Osaka, Japan, and is a leader in professional electronic manufacturing and rework equipment. You can spend a little more to get something that’ll last decades and has loads of replacement parts in the unlikely event something does go wrong. It’ll set you back about $125, and there are loads of aftermarket tips you can use for all different soldering needs.
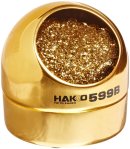
If your iron doesn’t come with one, pick up an inexpensive tip cleaner and debris catcher.
There’s plenty of other choices in those segments if you don’t like the look of any of those in particular. If you’re looking for something you can pick up in person, Home Depot often has these in their electronics/electrician aisles.
De-Soldering Tool
Now, this is a bit more “optional” of a buy. There’s a few ways you can avoid de-soldering components at all, and if you’re doing a vintage radio like point-to-point wiring it’s easy to just clip a lead, wrap it around, and use it to attacah a new component. For circuit board work, though, you’re likely to want something else.
The most basic option is a set of solder wicking braid. Apply a bit of flux (which helps the molten solder flow), then set the braid down over the joint and heat it up. When the solder melts, it’ll flow out of the joint and into the braid.

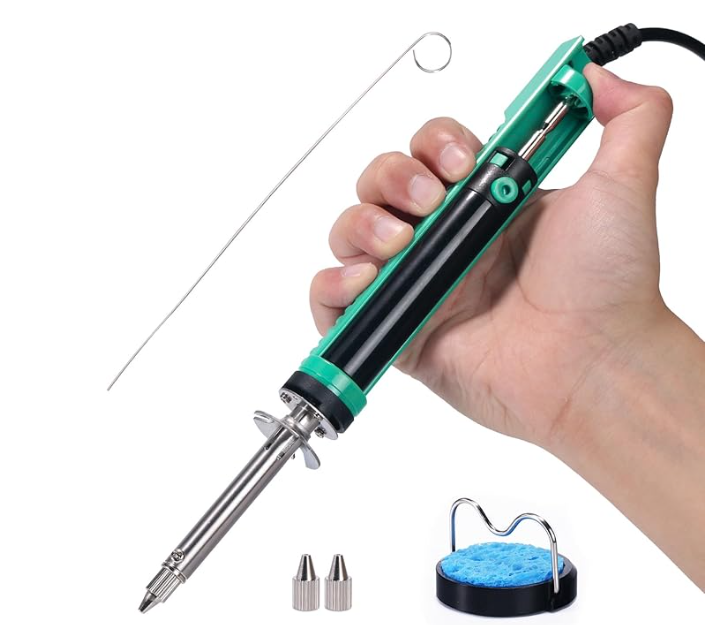
Now, using desoldering braid is annoying at best, and takes some skill to get going. You can get something like a manual vacuum de-soldering iron, which you apply over the joint with flux until it’s well melted and flows, then push the trigger to quickly suck the molten solder away. The manual style takes some practice, but they’re affordably priced.
If you’re willing to invest a bit more, you can get something that uses an electrical vacuum pump to apply strong suction along with the heat. This is getting pretty close to the hold standard, especially if you’re going to be doing a lot of work. It’ll heat up more quickly and evacuate the solder faster, so you have a smaller risk of heat damage on the board. These do have consumable filters which need to be changed, though, or you’ll risk damaging the pump.

Hakko makes a gun-style one as well, which is probably going to have a bit better reliability and support. It’s also considerably more expensive.

Multimeter
Multimeters are infinitely useful. You can use them to check voltages in your circuit (if something is low or high, that might indicate a problem) and to check the value of resistors, whether coils have gone open or there are broken wires between parts of inside a transformer, and more. (They’re also really useful around the house or in your car, too!) Inflation has caught up to some of these products since I initially wrote this guide 12 years ago, and they’ve come up a bit, but are still affordable.
A homeowner’s multimeter (for example about the size of a credit card, maybe that came in another tool kit) isn’t a good choice for these repairs, but even an inexpensive digital multimeter will be more accurate than most of the tools in a repair shop back in the day. Your device needs to include AC and DC voltage readings, and really should include an Ohms resistance reading. If you have one with those features it’s also likely to come with AC/DC current measurements, and potentially some other things like a diode checker, capacitor checker, and temperature probe.
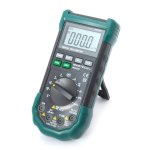
At about $60, a MASTECH AC/DC Auto/Manual Range Digital Multimeter will do the job very well. Even though I have multiple expensive bench meters, I still use this one regularly. It also can measure current, resistance, test diodes and continuity with a buzzer (useful for checking coils!), roughly measure the value of capacitors, and do some basic frequency measurements.
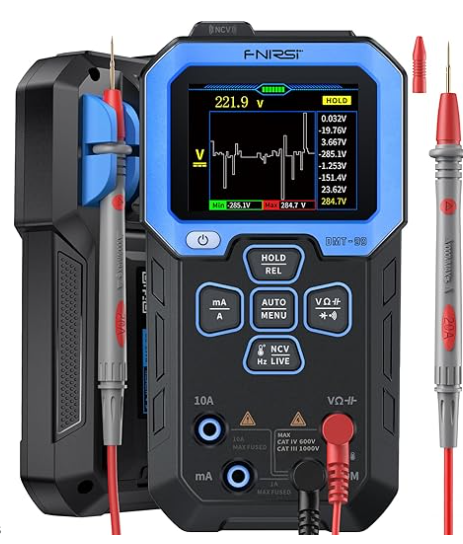
An up-and-coming entrant into this area, with highly affordable options, is FNIRSI. I’m not sure when they started operations, but look to be taking advantage of the fact that prices for computing power are always decreasing and are offering scopes, multimeters, and interseting combo units that look a cut above various no-name brands you’d find on Amazon or eBay. They look to be where some of the brands like Siglent or Rigol were ~20 years ago, but taking all of the lessons learned in that time.
I haven’t played with this myself, but overall they look to be a credible entrant in the test equipment market, and with gear that has more than enough precision for doing 90% of tasks needed in audio and vintage repair. They have a handheld multimeter with a scope-style display and some basic math functionality that looks pretty compelling. I haven’t tried it yet, but I’m interested.
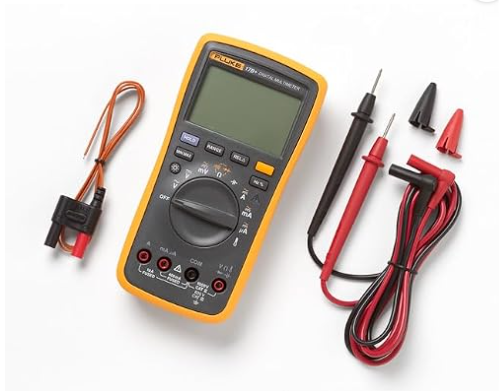
Of course, the gold standard in this space, used by electricians and professionals worldwide, is a Fluke. They’re bulletproof reliable, accurate, highly functional, and will last the rest of your career if you take care of it. They’re also priced accordingly. Unless you’re going to be taking your meter out in the field all the time, or have an unlimted budget, you don’t need this for hobby-level repairs.
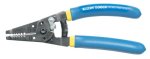
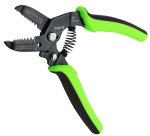
Wire Clippers & Strippers
Clippers
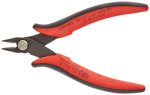
You’ll need to cut old component leads and cut wires down to size when doing repairs. A set of flush-cut wire clippers makes short work of this, and they’ll last longer and won’t get the cutting edges nicked up as if you tried to use a general cutting tool like a pair of household scissors. They’re very inexpensive – about $5 – and come in handy around the house as well as in the workshop. KATA Micro Wire Cutter Pliers
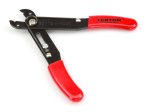
Klein Tools, a respected brand name, makes a pair for about $13 that’s functionally identical but will probably hold up a little bit better before wearing out due to being made from better quality metal.
Strippers
Along with the wire clippers, you’ll need to prepare old and new wiring for soldering by removing the insulation. If you’re an absolute glutton for punishment and have a steady hand with a delicate touch, you can make this work with the clippers, but I strongly recommend just spending an extra $10-30 to get the right tool for the job.
Hakko makes strippers with sized holes for 30-20 and for 20-10 gauge wires. If you can only pick one, go with the 20-10. but I do occasionally run into 22-24 ga. wiring in repairs and with something so fine and weak it’s especially useful to have the right tool.
Milwaukee offers an 8-20 model which is ergonomic and heavy-duty, although aimed at more of an electrician or installer market than a hobbyist for repair.
If none of those look good, click around a bit, or go check out your Home Depot’s electrical tools aisle.
Extras & Tips
If you’re going to be soldering, make sure to use Rosin Core Solder, which is the right kind for electronics and includes flux inside for a good connection.
There’s new RoHS-compliant (“lead free”) solder out there, but personally I find it’s more difficult to work with. Wash your hands after soldering and you’ll be fine using traditional leaded solder, like this 60/4o Electrical Repair Solder. Be sure never to use acid-core solder as you’ll damage your device, acid-core solder is only suitable for plumbing.
Soldering does produce some toxic fumes, and you’ll want to make sure you’re in a well ventilated area. They’re not the end of the world, but if you’re in a totally enclosed location or you do a ton of soldering it can be a problem.
If you can’t open a window and use a fan blowing air from inside to outside, or work on your stovetop with an externally venting range hood, you can use a variety of smoke absorbing filters for your workbench. You’re looking in the $40 range for a basic desktop model from Hakko or similar. More in-depth models with a flexible intake and HEPA+Carbon filter run more than $100 and go up considerably from there.
Sometimes molten solder can splash, or a piece of wire can go flying, and you’ll want to protect yourself. Safety glasses are highly recommended, a pair for about $13 will last forever and be useful around the house as well. That’s a low price to pay for peace of mind!
Conclusion
That’s all you’ll need to get started!
If you get further into the hobby, or run into functional issues once you’ve finished replacing the needed components, you’ll also want a few pieces of test equipment.
Look for my recommendations on hobby test gear for radio and electronics repair in a future article!

Pingback: Getting Started With Vintage Radio and Electronics: Basic Tools for the Hobbyist | RETROVOLTAGE
what was the items you ordered from parts express to rebuilt sansei 2500 crossovers, need to do the same also. thanks
Pingback: What do you get from a $25 multimeter? | KF7LZE's Blog
Pingback: Mastech Digital Multimeter MS8261 Unboxing | KF7LZE's Blog