
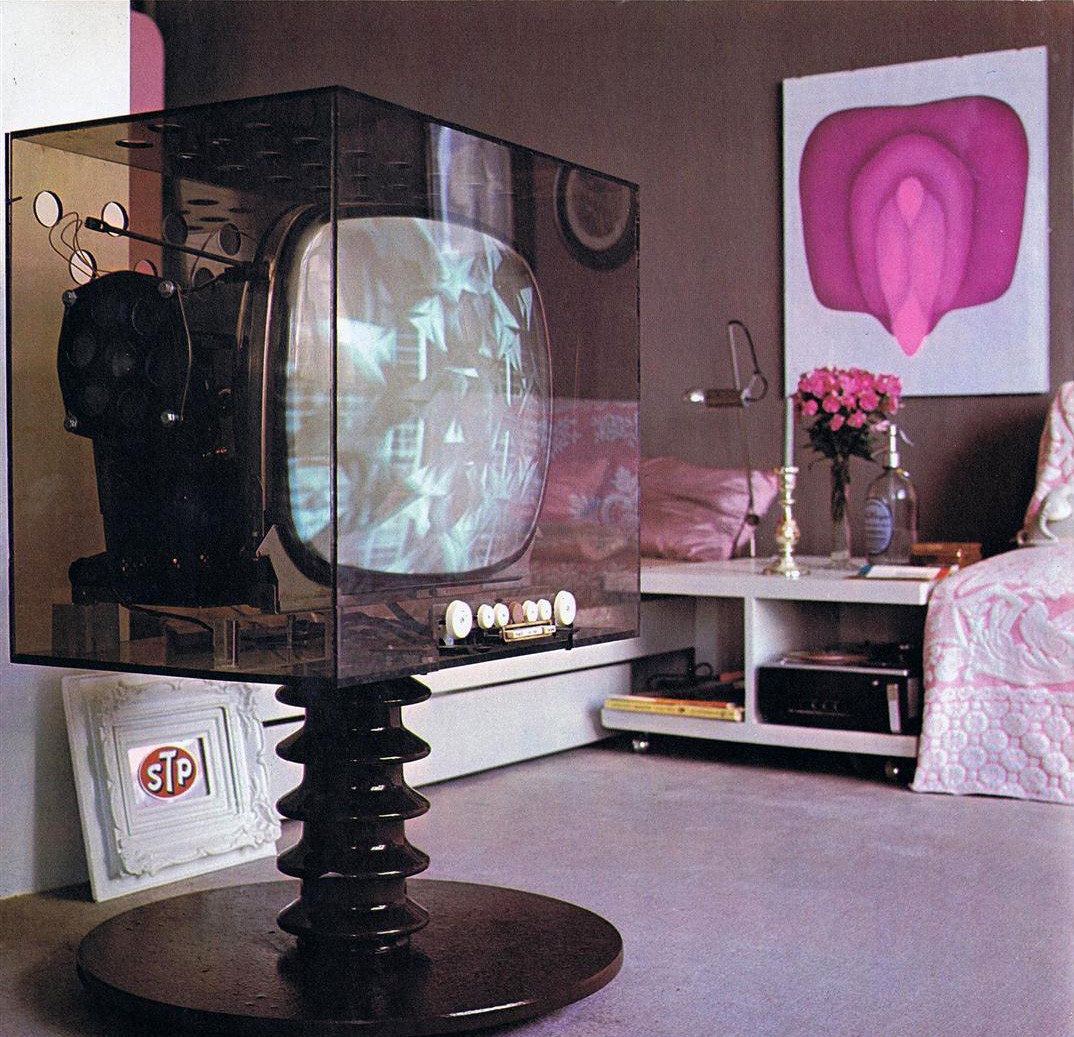
’70s Industrial Modern Television in Custom Enclosure
’70s Industrial Modern Television in Custom Enclosure
I’m wondering if anyone reading this might have some experience and could chime in. I’m trying to make my HP 3585A spectrum analyzer talk to my Windows XP laptop over GPIB (488.1) with a National Instruments PCMCIA-GPIB card. I’ve been trying both the Keysight IntuiLink Screen Capture software (specifically for this instrument) as well as the KE5FX GPIB Toolkit‘s plotter emulator.
The drivers for the GPIB card are installed correctly. NI’s self-test suite passes; IntuiLink scans the GPIB bus and recognizes the 3585A on address 11, and KE5FX’s toolkit recognizes the GPIB card and is configured for F8 = the 3585A on address 11.

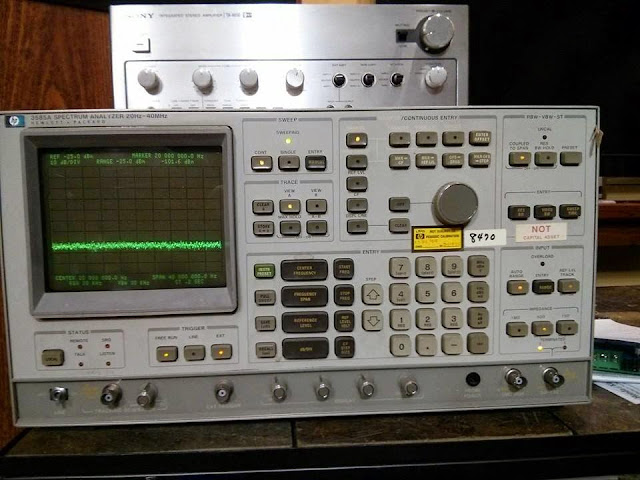
Sadly, Keysight’s app seems to do “something” when I ask it to pull a plot from the spectrum analyzer. It pops up a progress bar that takes a few seconds to finish and spawns a new window, but the generated image is totally blank. KE5FX’s app throws an unrecognizable error that’s something about the internal state of the app and exits instantly.
Anyone have any experience getting these things to talk to each other? Let me know, I’d love some pointers!
Update: It looks like I have a hardware issue with my GPIB interface, a new one appears to have solved the problem!
A neighbor approached me with his family’s Philco 40-201 vintage radio to be restored back to working condition. It had sat for several decades, very well preserved, but ultimately needed some service after the years.
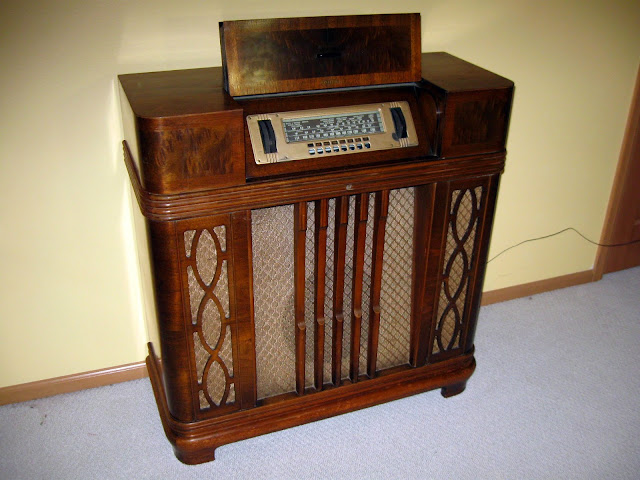
Very unfortunately, however, the original chassis had a bad case of the notorious Philco coil rot and while its audio section was fully intact and the power supply in good condition, the RF coils were rotted and couldn’t be repaired. This happened due to the acid in the paper ultimately corroding the finely wound coils over the decades – same reason photos from the time yellow and degrade. So, it was time to find another chassis to put into the opening.
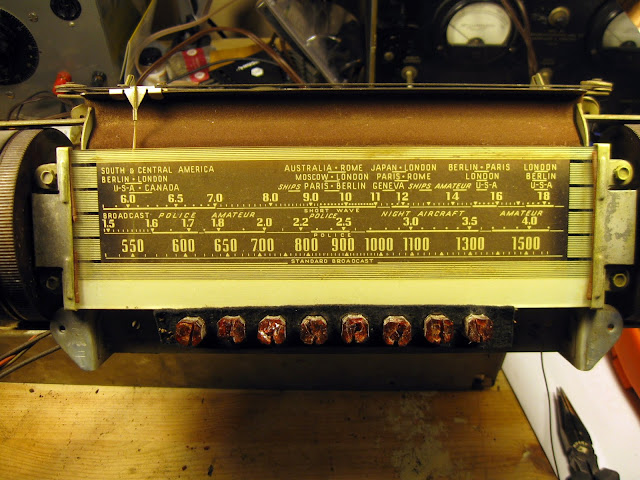
The oscillator coil, along with most of the RF coils, were the defective components on this one. This was a particularly insidious failure: the coils tested okay with a multimeter, but failed to oscillate due to green coil rot inside the windings, shorting turns together and killing the resonance. It took quite a few hours of diagnostics to narrow this down, since it was so subtle.
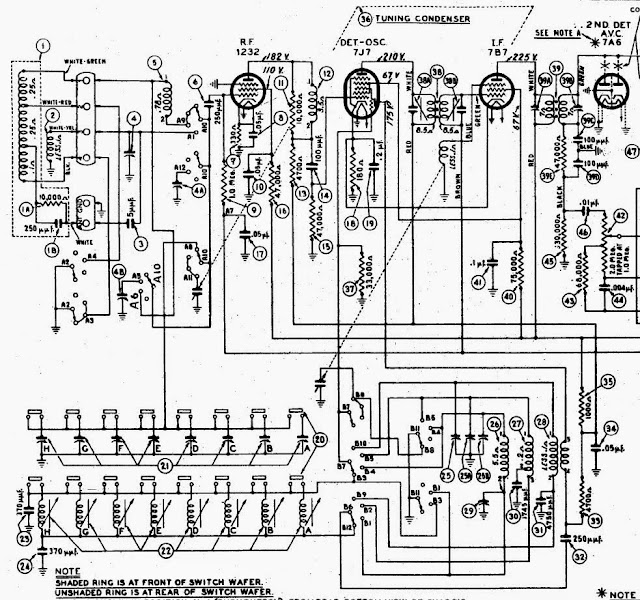
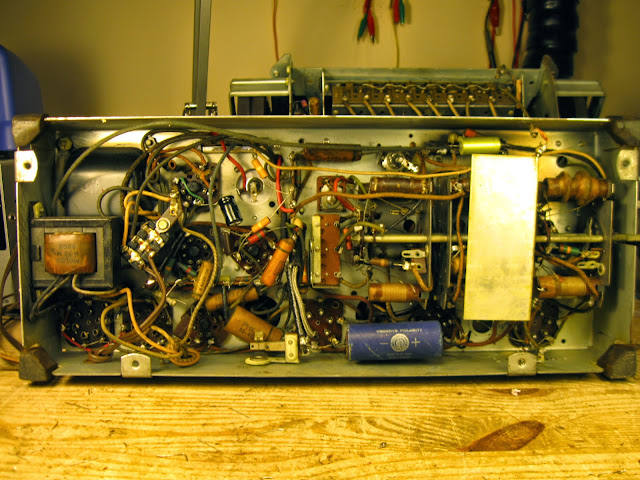
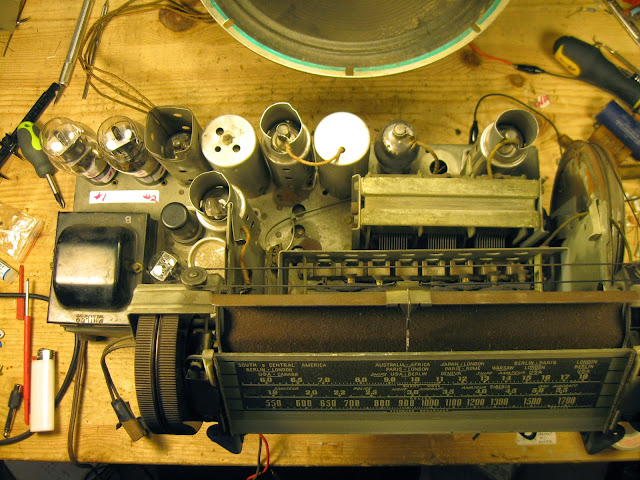
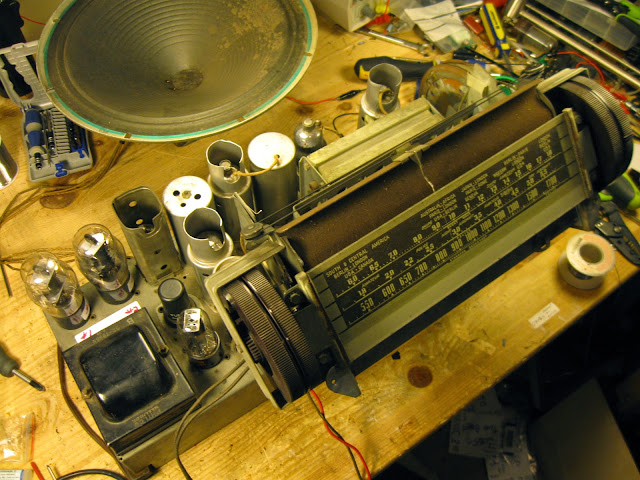
There are several chassis that will fit the opening, but the one I happened to find was from a Philco 39-45. They’re identically shaped, have the same dial scale, but some circuit differences. While the 40-201 uses primarily loctal tubes with the exception of the rectifier and #42 power output tubes, the 39-45 uses a mixture of octal and pre-octal tubes. The 39-45 uses a three-gang tuner and a tuned RF amplifier stage, which actually makes it a bit better of a performer than the 40-201.
The replacement chassis came partially recapped and verified working; I replaced the remainder of the capacitors and did an alignment.
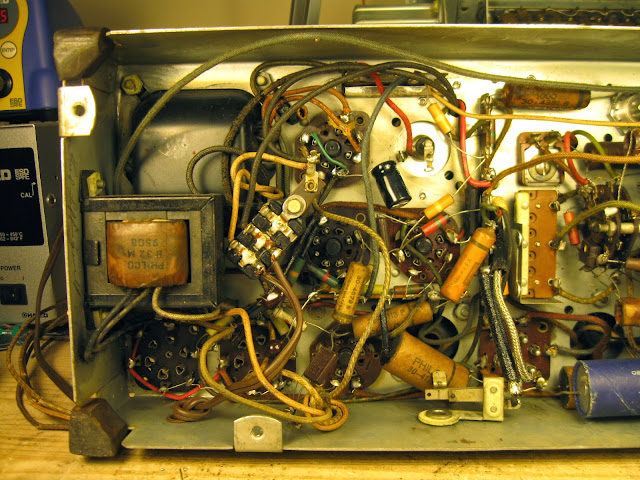
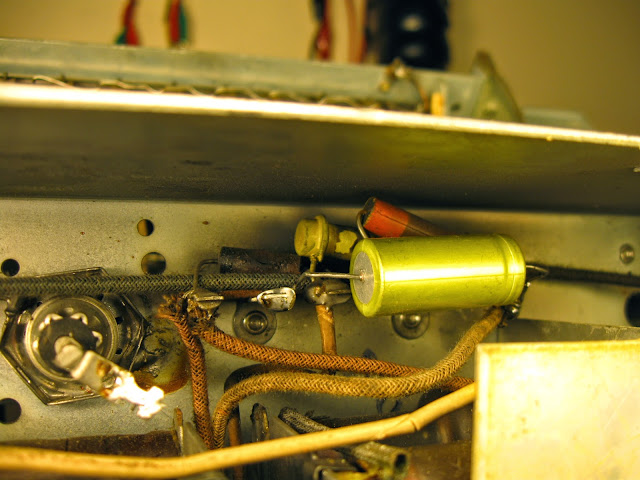
Finally, it was time for an alignment. It peaked up pretty close.
Finally, back in the case!
On the first trial run, it sounded fantastic – picking up AM stations across the dial, and very surprisingly about a half-dozen shortwave stations in Arabic, Spanish, English, and several other unidentifiable languages. It’s going to be a great performer – and a wonderful family heirloom – for a long time to come.
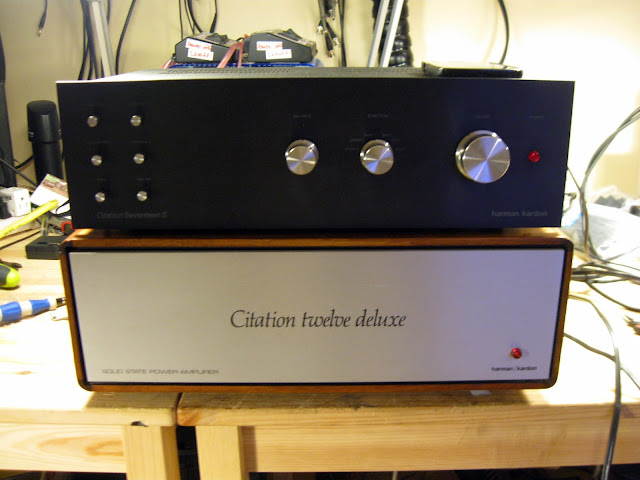
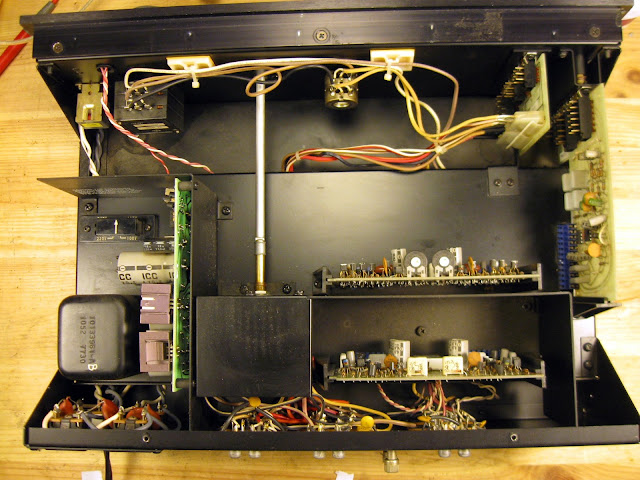
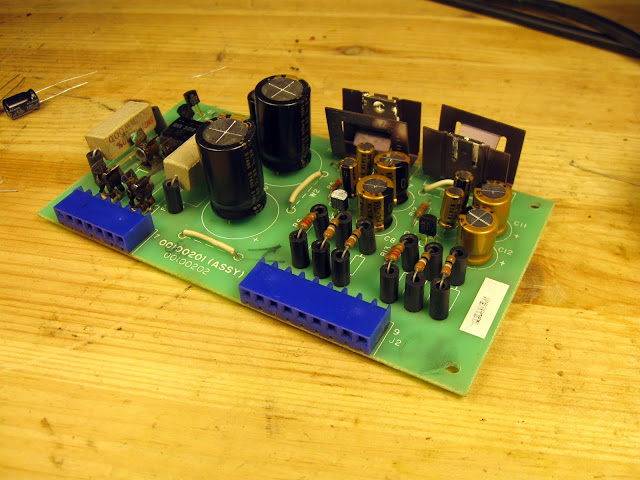
Matching the Harman-Kardon Citation 17S professional pre-amplifier shown previously, this Citation 12 Deluxe power amplifier is its 120W per channel companion. It came to the shop for a preventive rebuild after serving for quite a few years. The owner had the original service documentation, and a shop receipt from 2003 where the four primary filter capacitors were replaced. The previous shop did a good job, but by now the rest of the capacitors were starting to show their age and it was time for a rebuild before something bad went wrong.
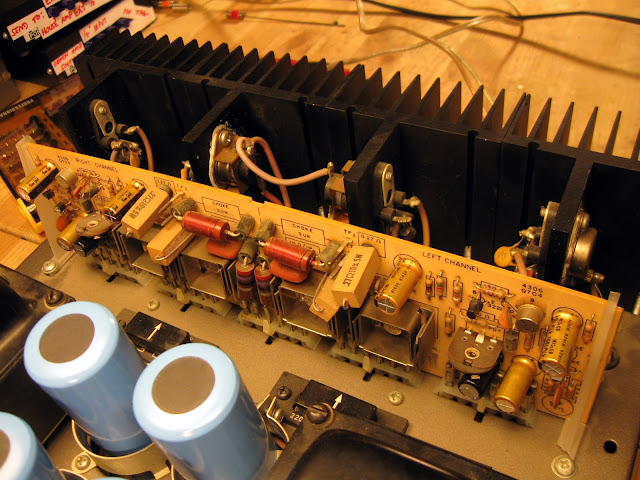
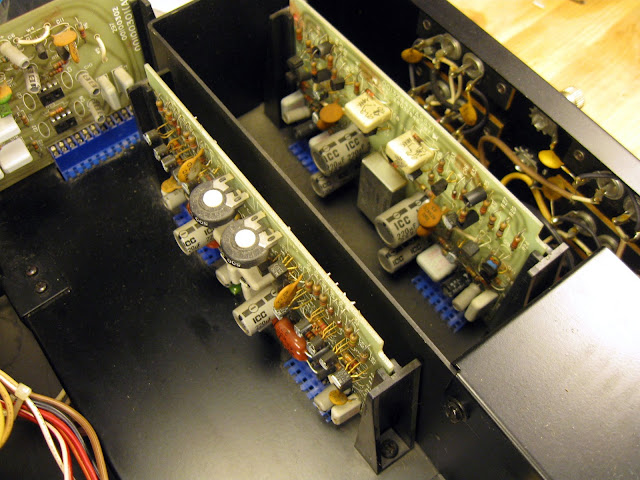
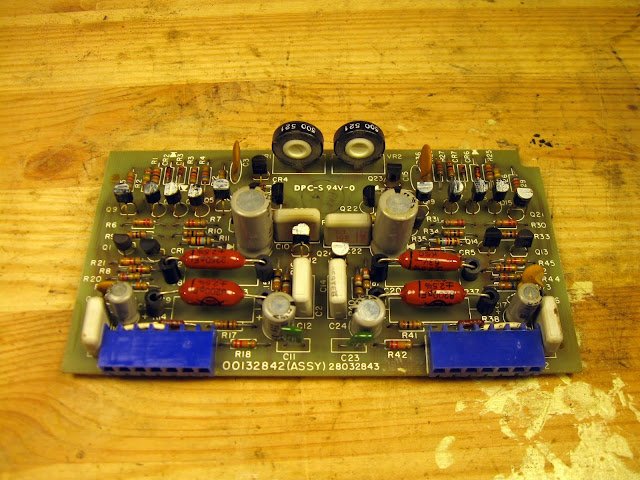
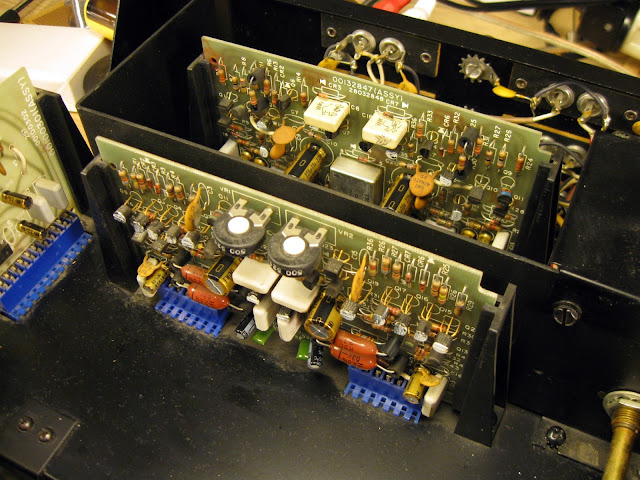
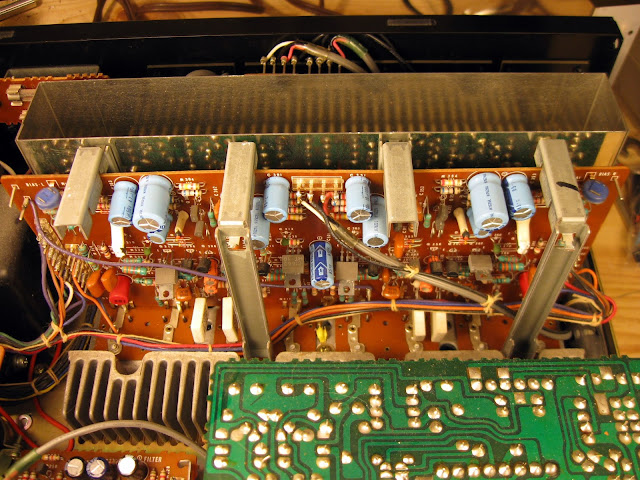
Following in the HK tradition, it’s very easy to service. There’s one PCB in the amplifier, with a multi-pin edge connector along the bottom. The entire board can be easily removed for service outside the chassis. New primary filter capacitors didn’t require any service, so this refurbishment focused just on the small capacitors on the amplifier PCB.
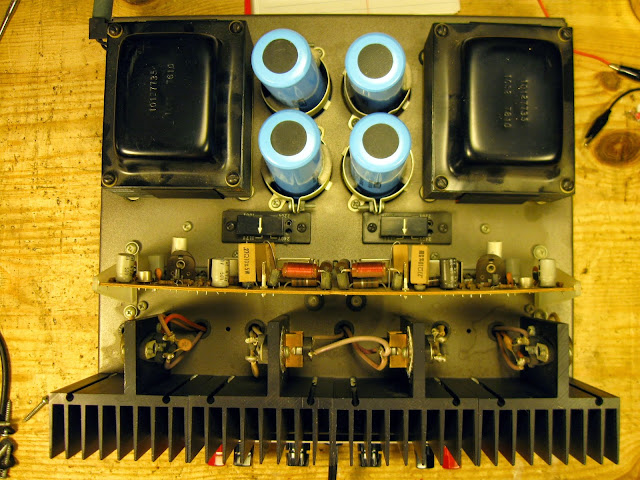
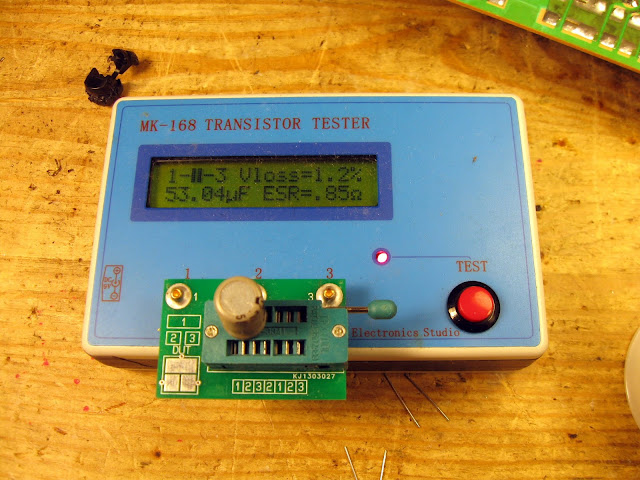
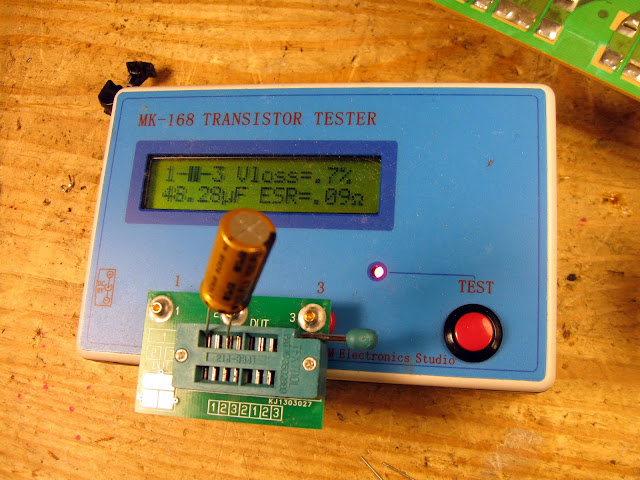
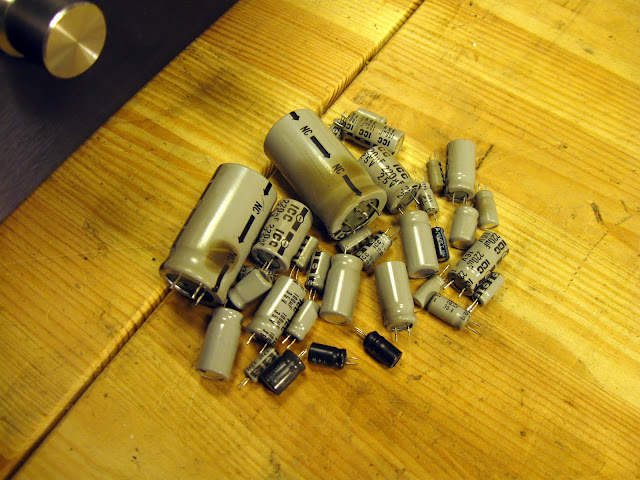
The capacitors were all going high ESR, which provides reduced filtering ability. Shown here comparing an old 50 uF capacitor (0.85 Ohms) to a new Nichicon Fine Gold 47 uF capacitor (0.09 Ohms), and a lower dissipation factor as well.
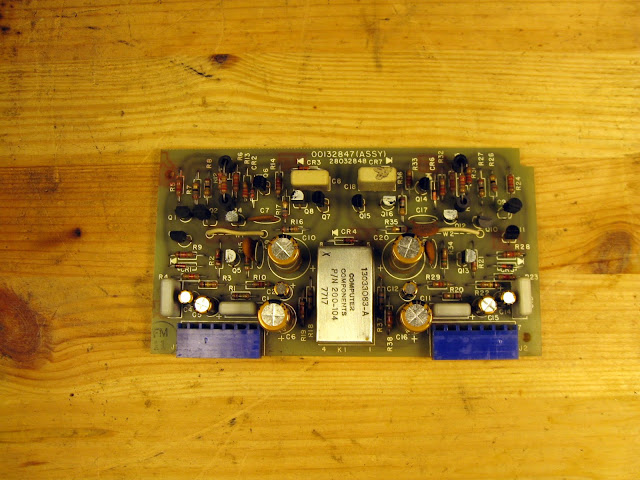
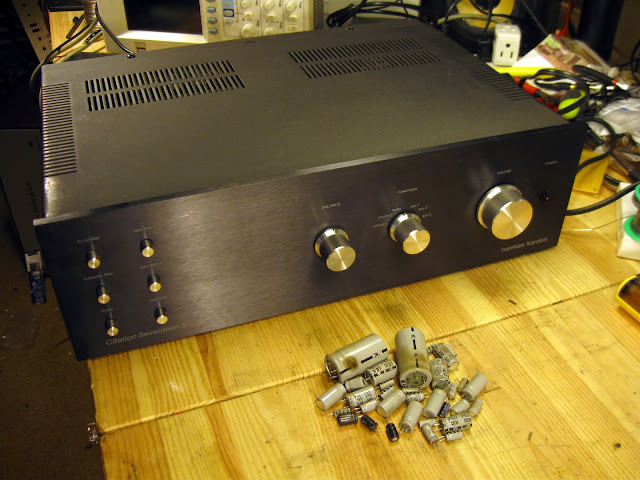
Back in the case:
After component replacement, the bias at TP1-2, TP3-4 measured within spec, so it didn’t require any further adjustments. DC offset is pretty low, about 10 mV per channel, and does not have a separate adjustment. Extremely low distortion and great performance through its power bandwidth, too!
The enormous capacitors provide a ton of power. Both channels play for several seconds after power is removed, although the left channel goes on for longer than the right due to individual variations in the components that are being used. Back in it’s case, these two are the centerpiece of a fantastic and powerful vintage system that’s going to sound amazing for a long time to come. It’s crisp, neutral and accurate sound lets the amplifiers take a back seat to the source material and deliver great sonic performance.
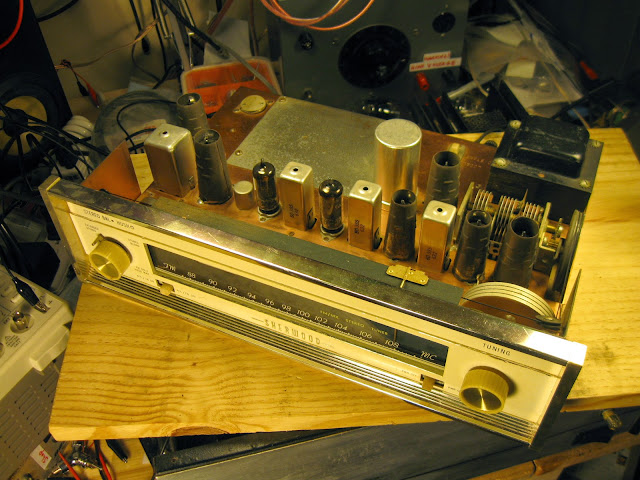
Sherwood made some excellent hi-fi FM tuners back in the day, and this S2000-III is no exception. Unfortunately, there’s not a lot of documentation about this model available, but that didn’t stop it from getting an overhaul and alignment.
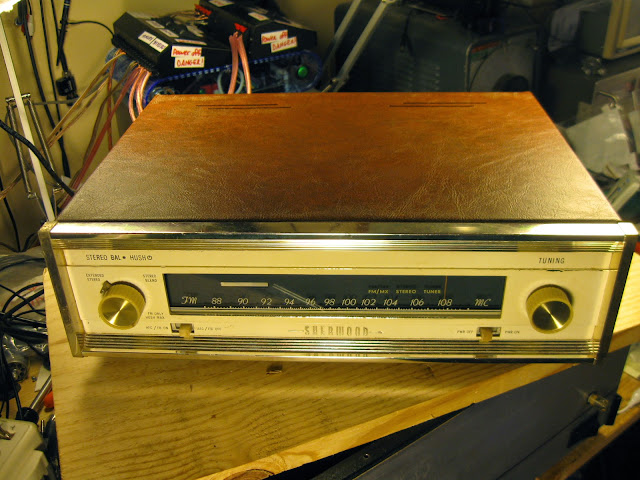
The Sherwood is marked like it’s a stereo tuner, but the stereo de-multiplexer is an add-on module on an optional separate sub-chassis which was either removed, or never fitted, to this particular model. As a result, most of the front-panel options for various stereo and blend settings don’t operate.
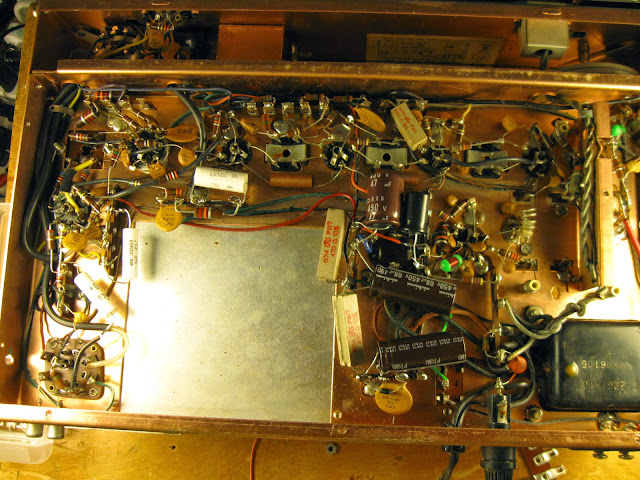
Most of the capacitors were ceramic but several bad paper-mylar capacitors were installed, contributing to its poor performance. The large metal plate is where the sub-chassis for MPX reception would be fitted, plugging into an octal socket above the chassis – but it’s missing, so this tuner will only receive mono.
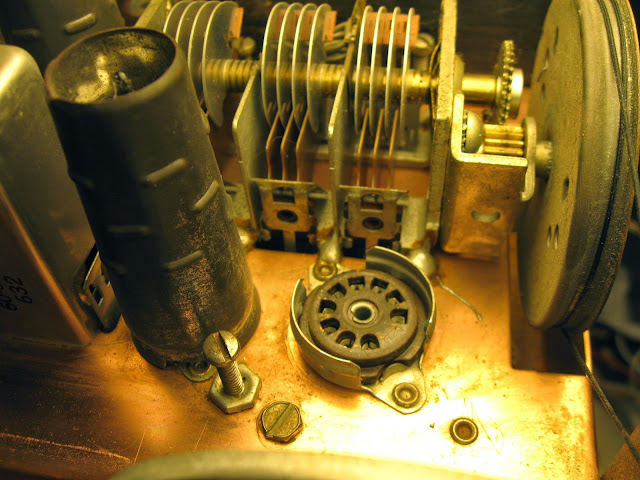
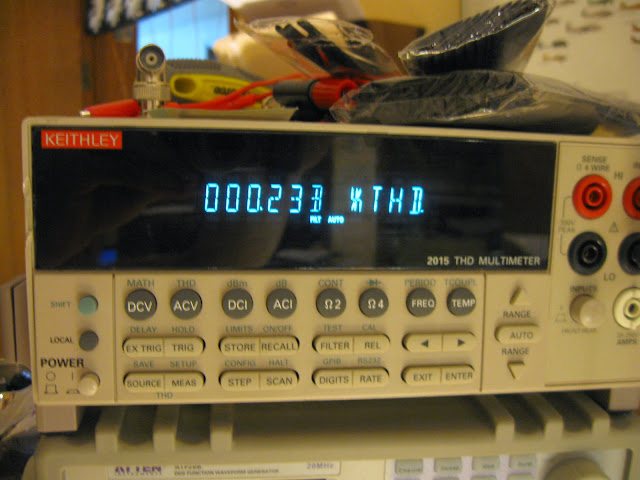
In addition, the 6BZ7 tube, used as a cascode RF amplifier, was defective with an intermittent heater; it needed to be replaced. After sorting the tubes and capacitors which were keeping it from running at all, I proceeded on to the alignment, coupling my signal generator to the distortion analyzer and using the 300 Ohm antenna connection. It was definitely out of spec:
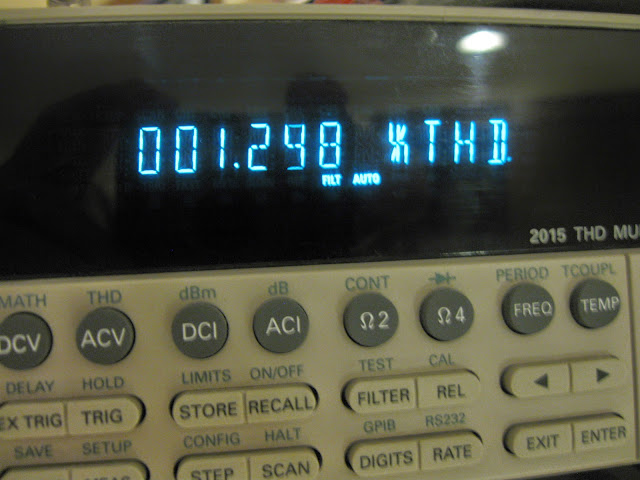
Alignment was fairly straightforward. First, I tuned up the oscillator to bring the dial into alignment, then adjusted the RF amplifier for strongest signal and lowest distortion. Re-tuning the RF amplifier significantly improved performance, but it had a ways to go still:
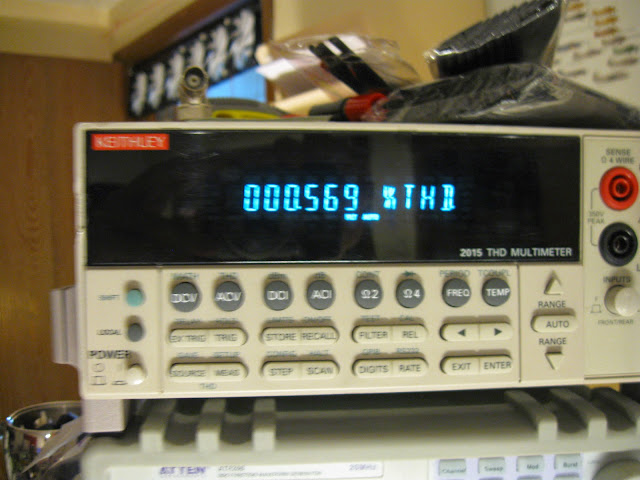
Finally, adjusting the IF chain from back to front for the point of lowest distortion at each stage really cleaned it up.
There we go! Much better. Most alignments can be completed, even without factory instructions, by aligning for lowest distortion with a distortion analyzer.
Fresh tubes, fresh capacitors and an alignment have this tuner performing very well. It’s going to be great for a long time, too.
I recently got to work on a Harman-Kardon Citation 17S pre-amplifier. Vintage HK gear is some of my favorite to work on: it’s robust, reliable, and built to be easy to service. The Citation 17 pre-amplifier is the companion for the Citation 12 power amplifier, and has a ton of features.
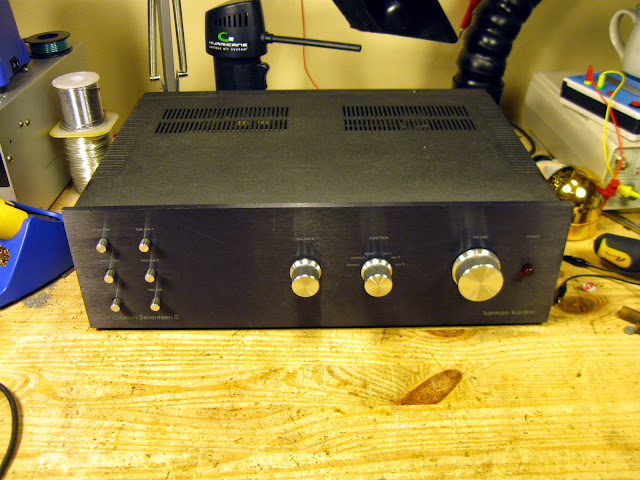
This one features a total of 6 inputs with 2 phono options, two tape loop outputs, and two pre-amp outputs which could drive a pair of power amplifiers.
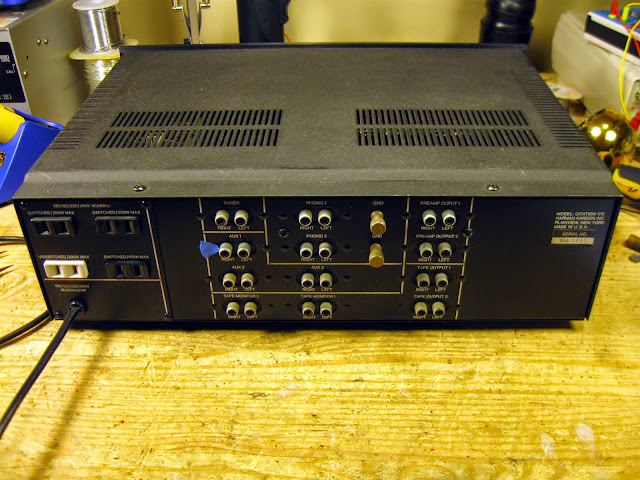
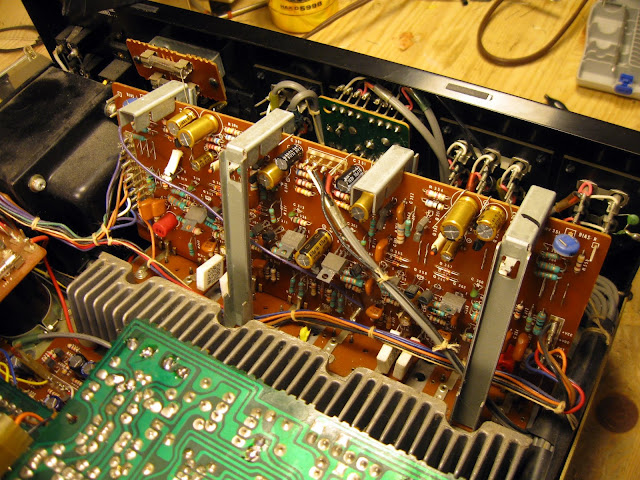
Inside, it’s extremely open, and all of the circuit boards are mounted on edge connectors that can be easily removed for service outside the chassis.
There are 4 circuit cards with a variety of capacitors on them. These caps were starting to show their age, but weren’t quite dead yet, but several had high leakage and high ESR and were definitely not doing their jobs. This one was the worst, where internal leakage and heat was causing the skin of the capacitor to shrink and pull back.

Lots of replaced parts from this one! Testing showed it was performing perfectly after the service. I also cleaned the balance pot as it was a bit scratchy.
This pre-amp will continue to serve faithfully with its companion power amplifier for a long time to come, and deliver the detailed, accurate sound HK is known for.
Pekka Väänänen must have been bored over the holidays, as he came up with a fantastic and fascinating new use for an oscilloscope and a laptop: playing a round of Quake on his Hitachi V-422 scope in X-Y mode.

After some pre-processing, apparently it’s a playable vectorized Quake game with a very unique display. Never seen anything like this before! Lots more details over on his site. Check it out!
Season’s Greetings!

Cross-posted from the Rain City Audio Repair Blog:
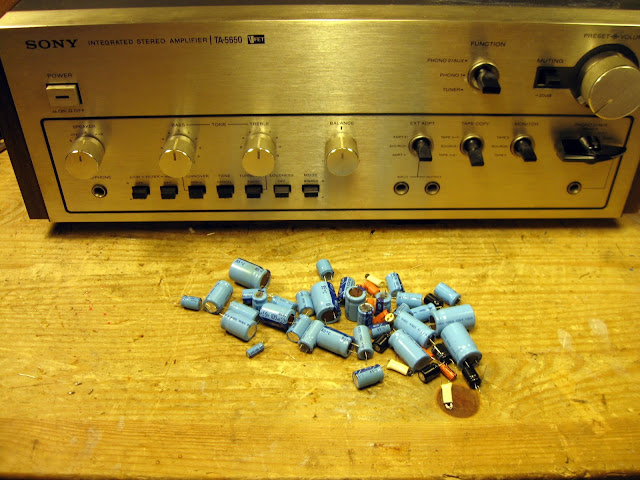
I recently got to work on a very interesting piece of vintage stereo gear from the golden age of hi-fi in the ’70s, the Sony TA-5650 VFET Integrated Stereo Amplifier.
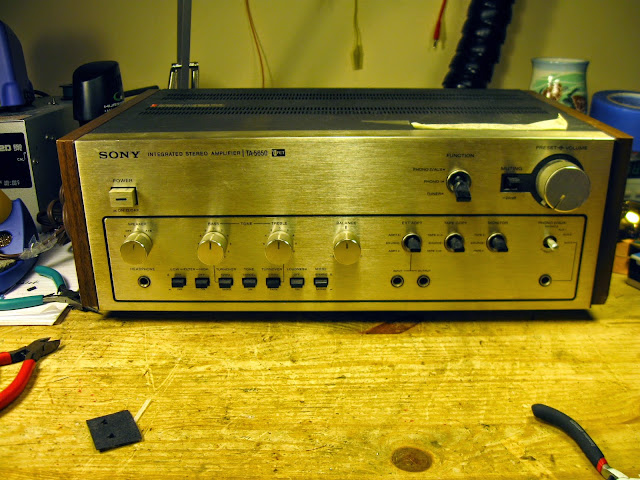

It’s a little rough, and while the power amp section works great the pre-amp doesn’t produce any output, this is a rare and interesting amplifier. In the output stage, the finals are Sony VFETs – a new and experimental type of vertically oriented FET which was being pioneered around this time. Sony used them in a small handful of receivers from the same year and never again in any other models or years; Yamaha produced a couple of models which used them as well, and oddly enough they turned up in a handful of 1990s MTX car audio power amplifiers – but overwhelmingly, it’s a rare and esoteric output device.
It’s also missing a knob.
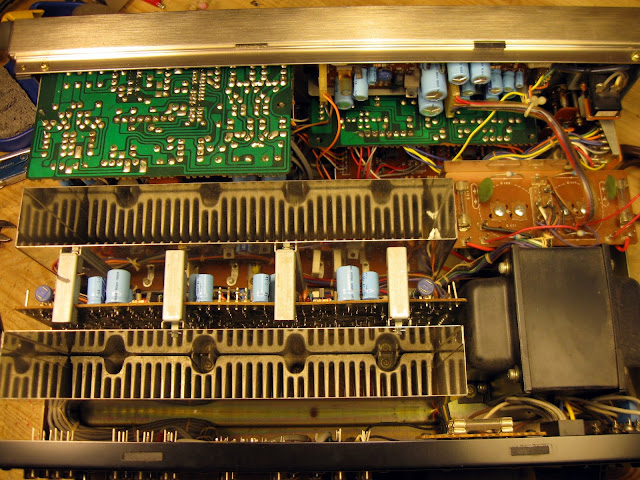
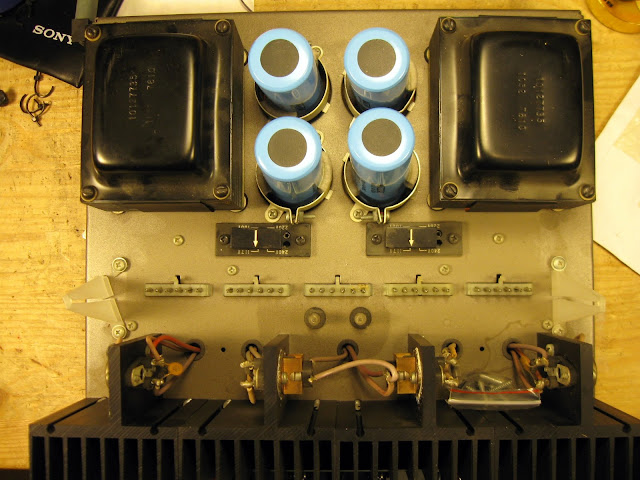
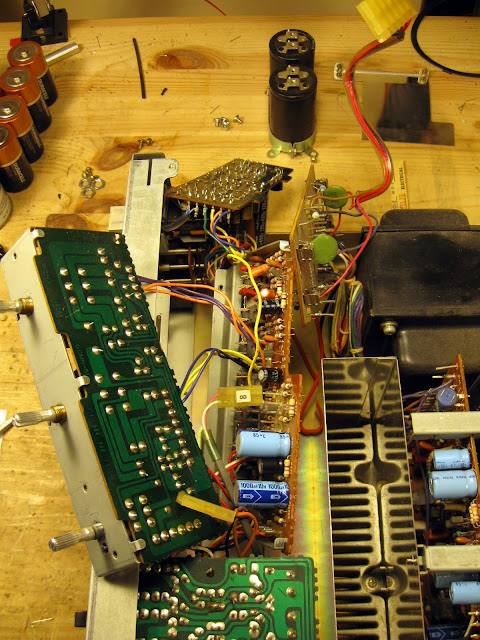
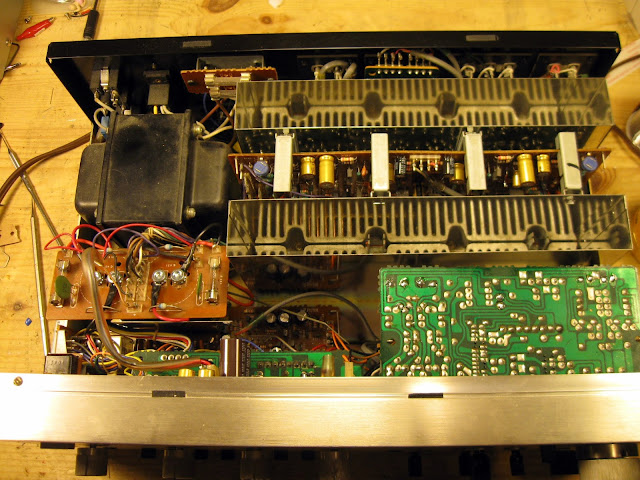
It’s a well laid out amplifier inside: Towards the front, the final module with large bottom-mounted heat sinks and chimneys to the top-side vents for good airflow. The pre-amp controls, power supply, and rectifier are along the front and there’s a large power transformer.
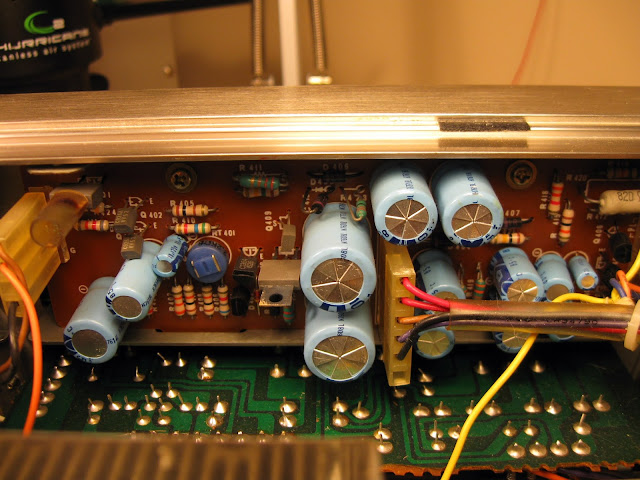
A shot of the regulated power supply. As a part of the process, all the electrolytic capacitors get replaced. At this point in the process, the underlying cause of the pre-amp failure isn’t known, but that doesn’t change the procedure. The most likely cause of failures is often a failed electrolytic capacitor which leaks and damages near-by components. With the front face and knobs removed, the boards can be removed.
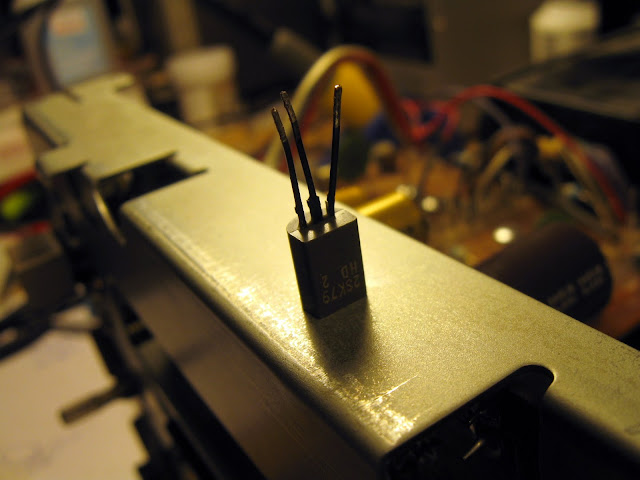
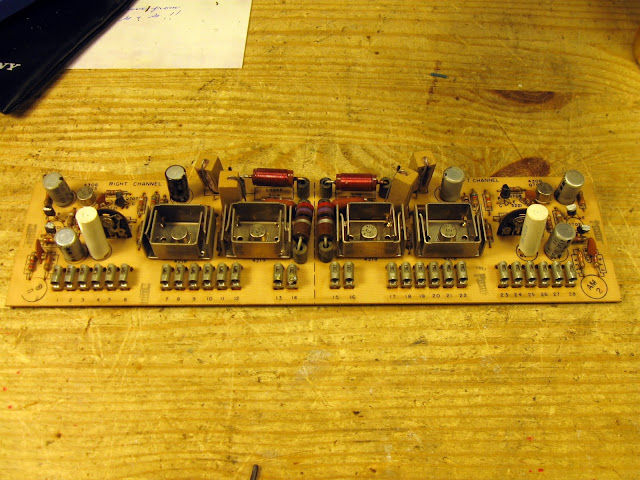
Overwhelmingly the capacitors were all replaced with Nichicon Fine Gold capacitors, although a handful in power supply circuits in high-ripple locations were replaced with other models with a better current capacity to ensure reliable operation. Unfortunately, however, this didn’t fix the problem: it turns out the 2SK76 small-signal VFETs were defective. That does mean this integrated amplifier will never have a functional pre-amp again, but it’s still a fantastic power amp stage.
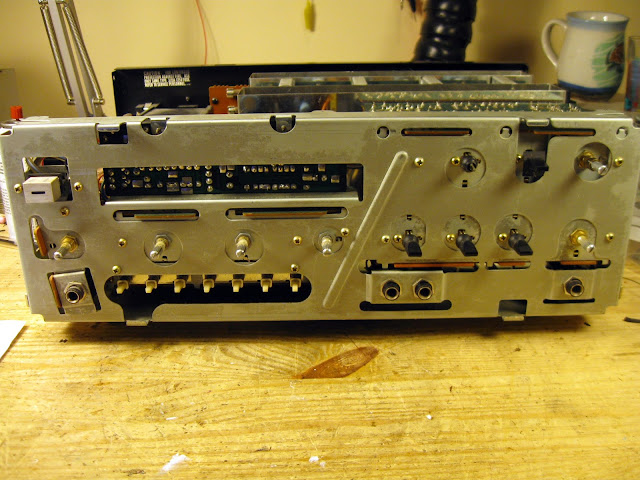
The chimneys clip into the board supports, with the VFETs along the bottom. Removing it exposes the board to view.
One major reliability problem with these Sony VFET amplifiers, which has sent many of them to an early grave, is the varactor diodes used in the bias circuitry. They’re used to provide a stable, temperature-invariant voltage reference but unfortunately over age (aided by leaky capacitors) they tend to start to avalanche and fail to prove bias, instantly destroying the VFET output devices. They’re unobtanium, so if this happens, really the only source of new parts is another one that’s died for some other reason.
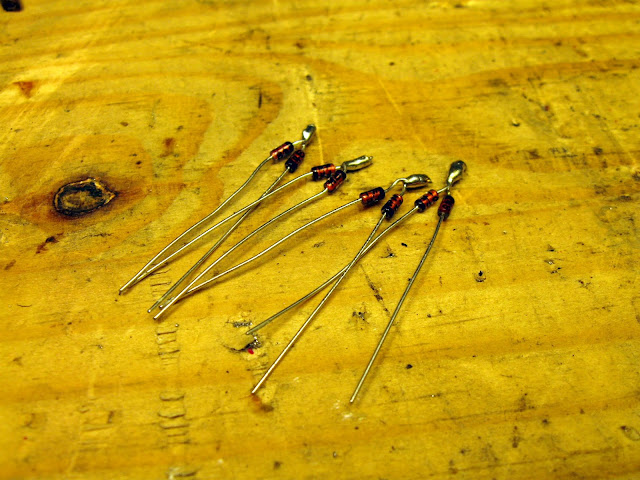
It’s not pretty, but it works: these VD-1221 varactor diodes can be replaced with a pair of 1N4148 in series.

One other issue with the Sony VFET series of amplifiers is the rectifier board. Sony used screw-in capacitors with a 10mm lead spacing; these are no longer manufactured. It was necessary to extend the leads and mount the board slightly on an offset. Again – not pretty, but completely functional.
After mounting everything back together, adjusting the power supply’s voltage reference, and adjusting the bias on both channels it was time for a burn-in test. This one plays very well with exceptionally low distortion, crisp and clear highs and a very triode-like midrange owing to the VFETs.
Quite a few parts were replaced during this repair – and I found a “new” chickenhead knob as requested by the owner to replace the missing knob (on the far right.) Fully reconditioned like this, it’s going to sound fantastic for a long time! These are pretty uncommon to find these days, so even with a bad pre-amp section it’s definitely worth the effort to repair – and with the low distortion and unique VFET sound it’s great for an audio enthusiast. This particular one belongs to a Grammy® Award-winning record producer if that gives you any idea of the quality and performance.
(Appended years later: this same exact unit came across my bench a second time from an owner who picked it up at an estate sale and wanted the preamp repaired — unfortunately that wasn’t going to be possible for him, but he put it to good use paired with the companion amplifier anyway.)

Watch a McIntosh Tube Amp Come to Life
Discovery’s How It’s Made shows us how a McIntosh vacuum tube audio amplifier comes to life:
http://www.youtube.com/watch?v=2HgS6gvokEI
Definitely worth watching!
Share this: