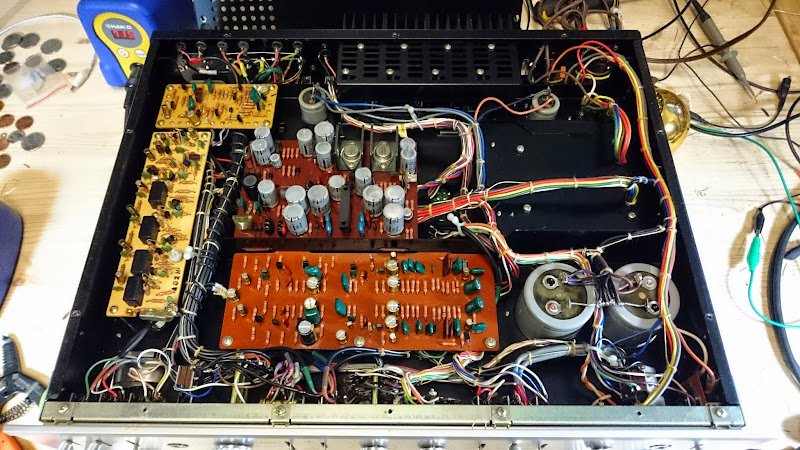
I was recently in the market for a new laptop to replace my aging ProBook 4415S. It was a middle of the road HP business laptop from 2009, and over the years I’d upgraded the RAM to 4GB and installed an SSD, and replaced the battery three times. Even with those modifications it was still feeling the effects of six years of wear and tear, and so I demoted it to shop laptop and decided to pick up a modern replacement.
I thought for a long time about what I needed in a replacement machine. Gaming would be great, but I really wanted something with a long battery life and small form-factor. A high-resolution screen and good graphics was a must, too. I pretty much always have Internet access either at an access point or by tethering to my T-Mobile phone’s built-in free hot spot, and about the only thing I ever use a laptop for anyway is web browsing and document creation. I use a desktop at home for the heavy lifting.
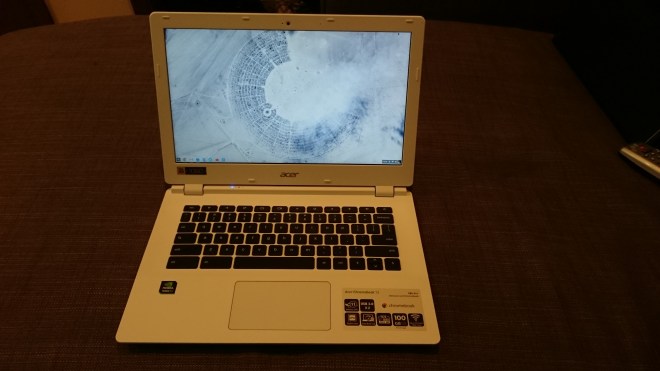
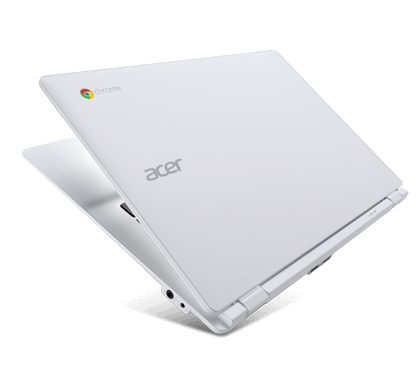
Ultimately, I ended up with an Acer Chromebook 13, part of the CB5-311 series – it’s a big change of pace from my previous computers, but I think it’s the right choice. I’ve been using it for a solid 2 weeks as my daily-driver laptop and while not without a few quirks, I’m overwhelmingly both impressed and satisfied with its functionality and quality. Keep in mind throughout this review, that this is mostly just a platform for a web browser: there is limited to no support for apps and limited offline functionality of any kind.

Overview
The “CB5-311-T1UU” is a pretty impressive machine when compared with most of the other Chromebooks out there. It’s powered by a quad-core 2.1 GHz nVidia Tegra K1 CPU, nVidia Kepler GPU featuring 192 CUDA cores of the same variant found on desktop GeForce cards (in contrast, a middle-of-the-road current generation GeForce might have 1280-1536 of those same CUDA cores in it’s arsenal – but it’s an impressive graphics compliment for a lightweight device.) All this power pushes a 13.3″ 1080P Full HD screen backed by 4GB of RAM and a 32GB solid-state drive.
As far as ports go, there’s a pair of USB 3.0 host ports, a full-sized SD card slot, a full sized HDMI port, and the charging port. It also features the fastest and latest 802.11AC WiFi.
When closed, it’s less than an inch thick and weighs only 3.31 lbs., so light I barely notice it in my bag.
The Good
As mentioned before – it’s quite light, and the powerful CPU and GPU combined with the SSD make it incredibly quick to boot up, and I’ve been unable to get it to slow down and lag on me in normal usage. As I’m writing this, I have 11 tabs open including a large PDF, and it’s chugging along quite nicely. Transitions between tabs are quick and scrolling is smooth, although there is a small delay to render a change to the screen on the PDF that I don’t experience with the desktop when zoomed in on a big file.
The system boots up from cold in about 10 seconds, from powered off to usable, and it only takes about 5 seconds to restore from standby. Not bad at all! It’s also shockingly powerful. I was able to side-by-side stream a 1080P Netflix video, and a 1080P YouTube video simultaneously each on half the screen and neither suffered any lag, stuttering or artifacts.
Acer rates the battery at about 11 hours of usage in normal conditions, and I’d consider that accurate. I certainly manage a full day’s usage on a single charge, plugging in at night and using it in several 3 to 4 hour sessions throughout the day. I bet it would be possible to push 12 hours if you kept the brightness low and worked only one or two tabs at a time to keep the load down. And all this at $377 – a high end Chromebook for the price of a low end Windows machine.
The “Different”
I wasn’t sure if I’d consider the Chromebook an actual “laptop” at first, but I’ve decided it qualifies. There are a few differences, though.
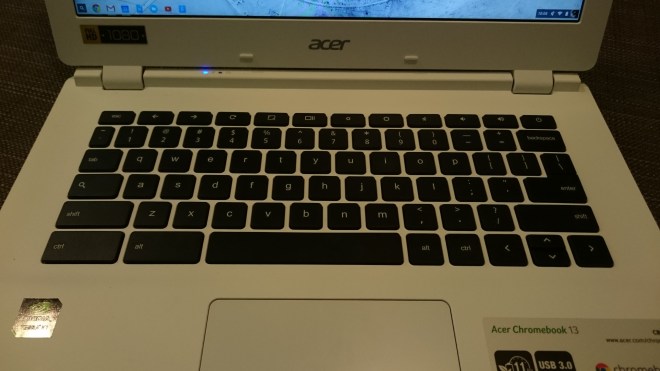
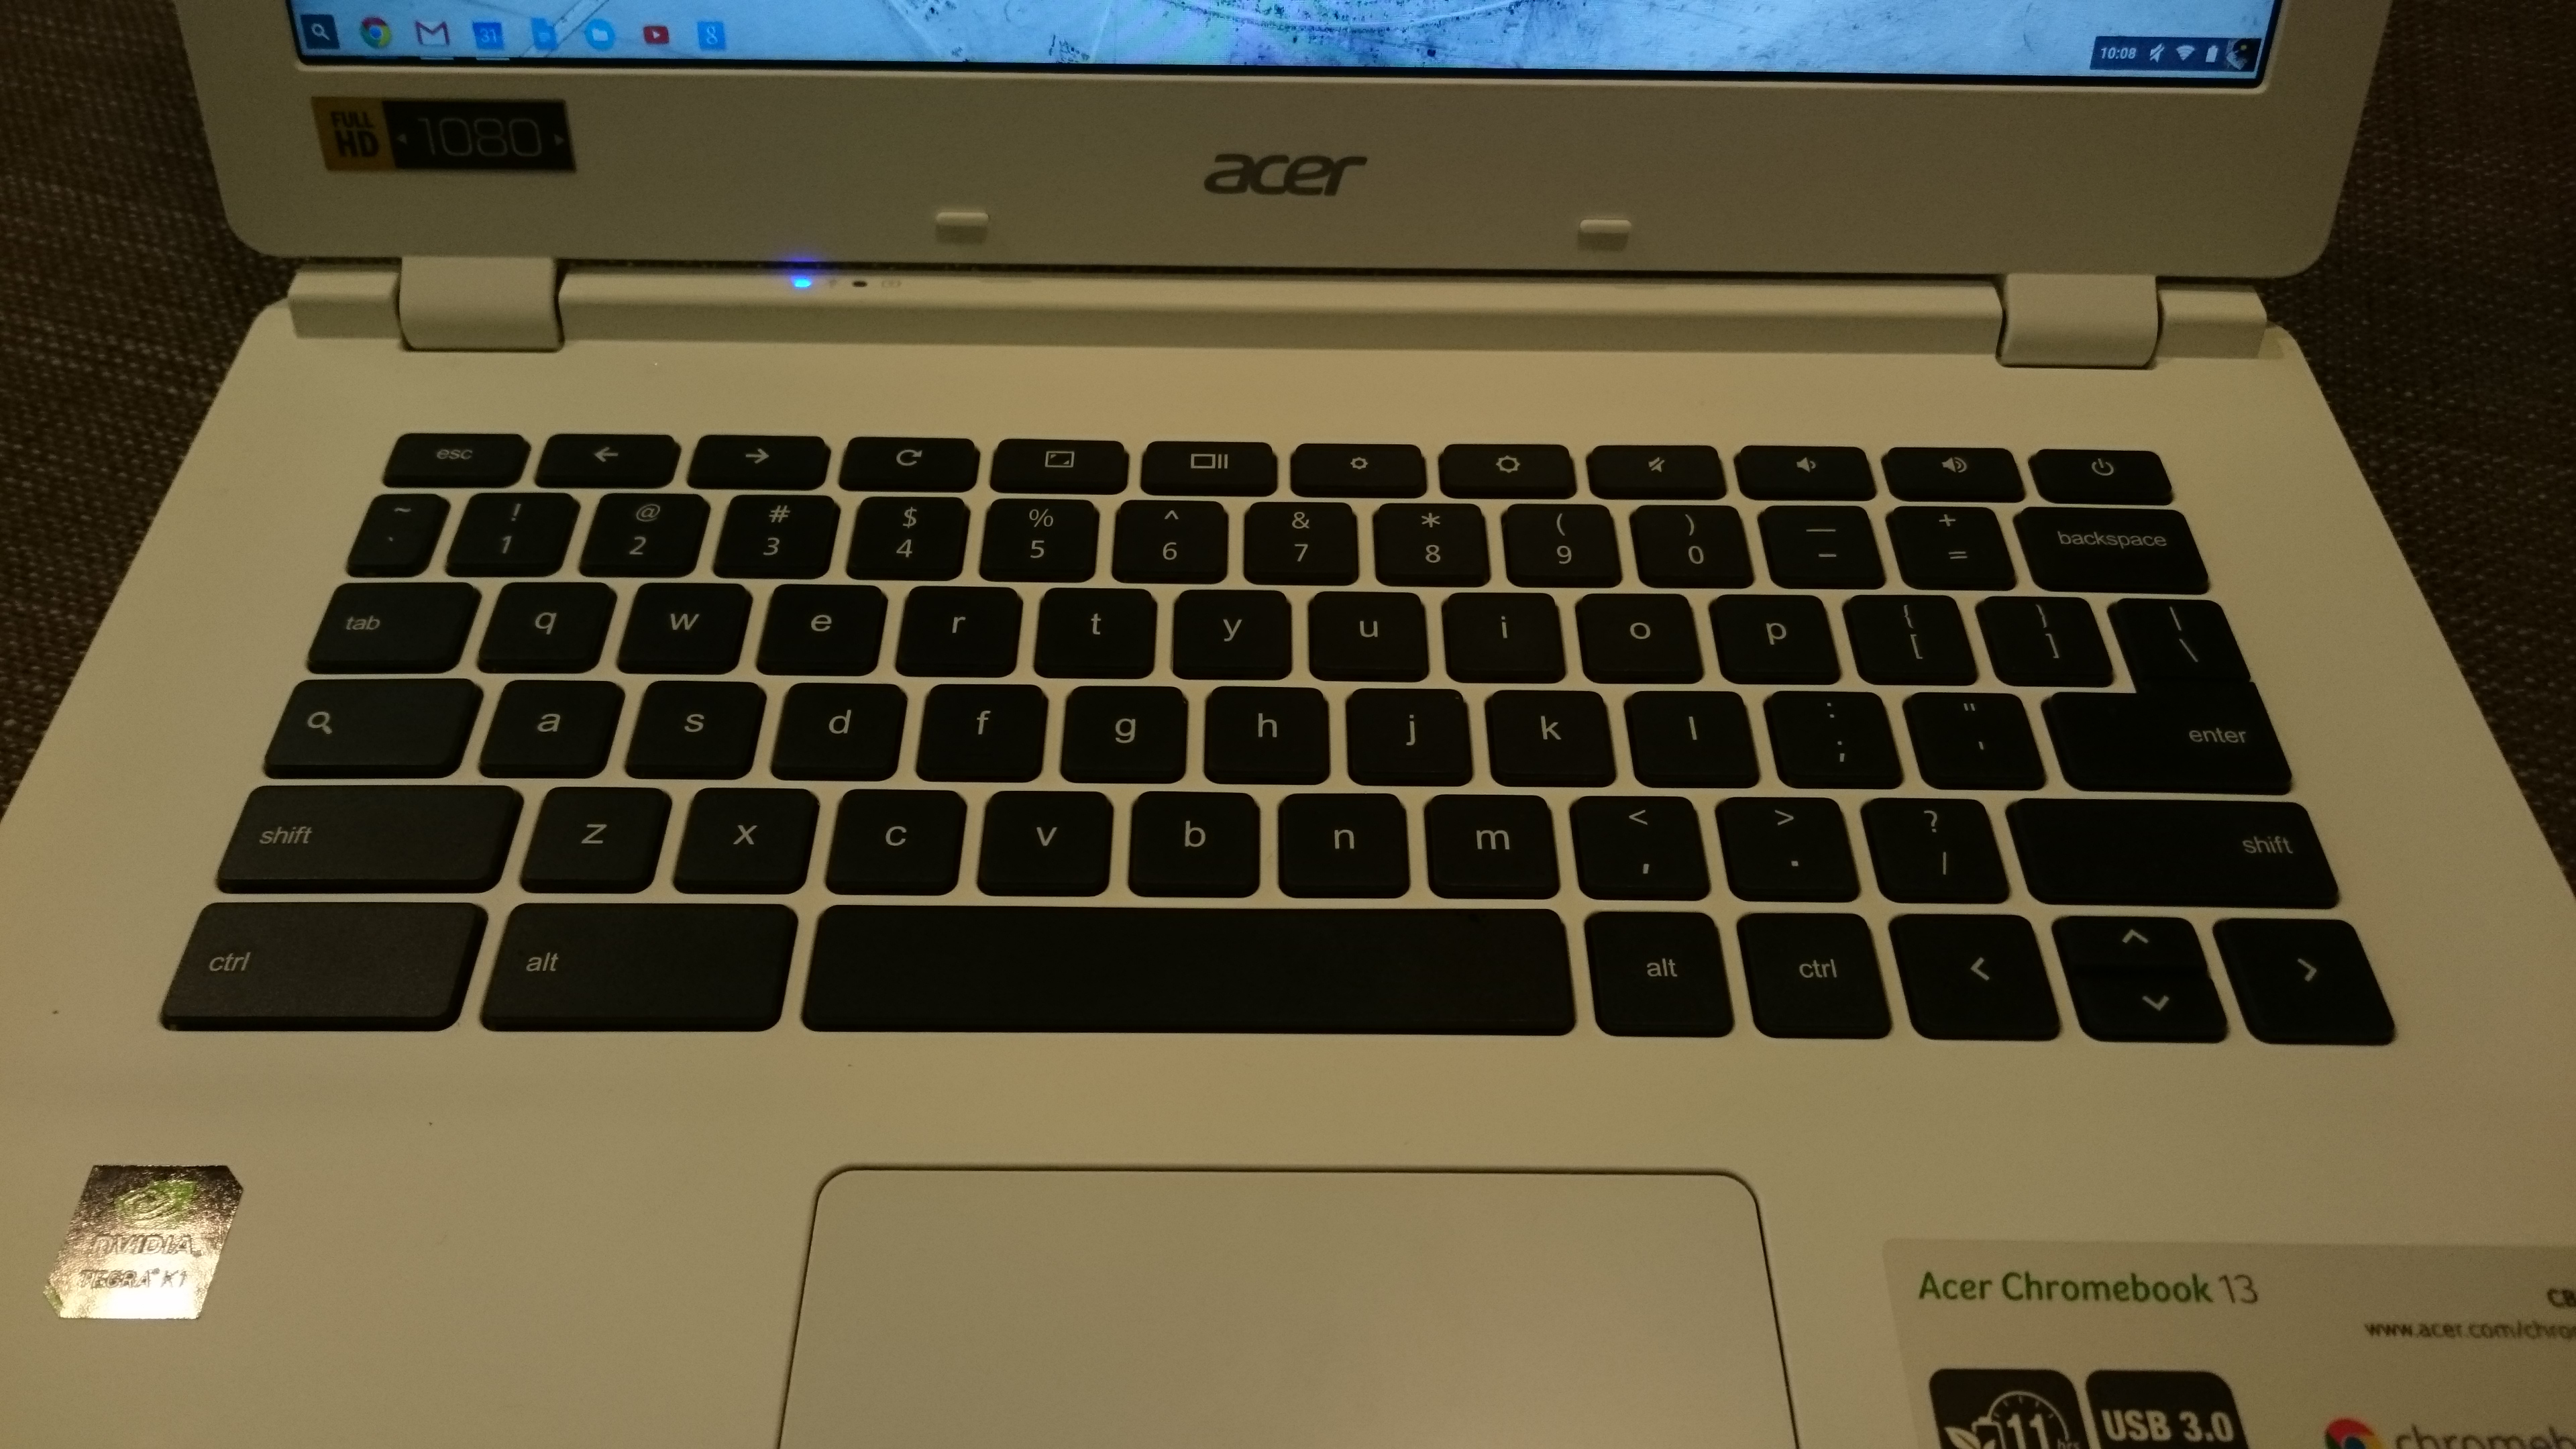
The keyboard has dedicated Chromebook functions arranged in the top key row in place of function keys by default (although, you can override this in settings and turn them back into unlabeled function keys.) There are hard buttons for refresh, tile windows, brightness, sound, and a combination log-off/power-off button in the top right. There’s also a dedicated “Google Search” button in place of caps-lock which calls up a search box instantly from any screen.
The keys feel okay, but not great – they don’t offer a huge amount of tactile feedback, but I adapted quickly to the typing style. Some commonly used functions like Home/End/Page-Up/Page-Down are missing – but if you hold Search and press an arrow key those functions are available but unlabeled.
The touchpad is a little odd. It has a single physical button along the bottom but not marked separately on the surface. I found (and find) the mixed gesture input system a bit disjointed, personally. Tap or click to left-click, two-finger tap to right click, and a three-finger tap is a “middle click” to open in a new tab. Unfortunately, though, I find it difficult to actually touch three fingers to the surface closely enough in time to actually register a middle click and it ends up either left-clicking or right-clicking somewhat unpredictably. I’ve adjusted to just right-clicking and selecting “Open in New Tab” as appropriate.
Although the Chromebook does manage to support Flash (as well as the latest and greatest HTML5 technologies), it’s uncommon enough that some sites don’t deal well with it. HBO Go, for example, won’t load. Installing the “User Agent Switcher” extension which lets you tell your browser to identify itself differently to a web site, and telling the browser to identify itself as Chrome for Windows instead of Chrome for Chromebook, seems to fix all of those problems. HBO Go itself works just fine when accessed with this trick, but it will give you a thoroughly broken text-only page if you’re identifying yourself with the default user-agent string.
The Ugly
Closing the lid puts the laptop to sleep but it continues to draw power, and it will do so until the battery dies unexpectedly, leaving you surprised and muttering expletives under your breath when you pull the laptop out and find yourself without any power. I’ve not found a setting to change the power management behaviors, either. Snapping the lid closed should only be for a short break – you should always remember to hold the power button down until it logs off, then powers off, to make sure you don’t drain your battery.
Don’t count on a Chromebook to connect to most VPNs. Google’s Product Forums trash PPTP VPNs as being fundamentally insecure, and state that as a security-focused product (everything locally is strongly encrypted all the time) they won’t offer support for an insecure technology. In the same breath, they admit PPTP is better than nothing, but don’t support it and don’t have any plans to. Given that most commercial VPN services, workplace VPNs, and home VPN router hosts use PPTP this is incredibly frustrating. You’re stuck with a few variants of L2TP, and OpenVPN, if you want to secure your Internet traffic over your access point. Great if you’re a Linux system administrator in your spare time, less great if you want something that “just works”.
This lack of functionality means I’m looking for a replacement for my ~1.5 year old, $150 Asus router/access point, and frankly, it’s downright arrogant of Google to refuse to support the most commonly deployed VPN technology for questionable ideological reasons that won’t resonate at all with the general public.
Overall
I’ll rate this Chromebook a 4/5, overall, and give it my recommendation. At only $377, it’s capable enough and very portable which is the majority of what I want from a laptop these days. It’s not without some caveats, though, as noted above – and while you can get a Chromebook down to around $200, the less powerful versions might offer a noticeably less powerful experience and lower resolution screen. Either way, though, a $400 Windows laptop would be a very entry level piece of gear with poor battery life, so considering what you’re getting it works out very well.
It’s absolutely not for everyone: if you do any gaming at all, or need access to any apps at all, this isn’t the machine for you. On the other hand, if you’re mostly interested in browsing the web, streaming video and some light document creation this could be a good choice and it’s definitely worth looking into at least.
[Acer Chromebook 13 CB5-311 Series from Amazon $377.99]


The Speaker Spotter – Speakers of Craigslist: June 3rd, 2015
It’s back – the Speakers of Craigslist, a periodic round-up of what’s interesting on my local Craigslist these days. Sorry for the hiatus, putting these together is a bit of work! As always, I am not affiliated with any of these listings, and you should contact the poster of the add with questions or to make a purchase. Craigslist moves quickly, so if the ad is gone, it’s probably already been sold but the info is still good for getting a feel for the market. And so without further introduction…
1. Pioneer CS-88 Lattice Grille Speakers
Down in Tacoma there’s a decent set of Pioneer CS-88 speakers for sale. Pioneer’s vintage speaker line is known to sound quite good when fixed up, and this would be a perfect pairing for an amp or receiver like the Marantz 2245, for example. They could use a quick shot of blush remover, Howard’s Restore-a-Finish, and some wax (about the most basic refinishing you could do) but look like they’re intact and solid. They’re asking $100.
2. JBL L220 Vintage Monitors
Old-school JBL sure commands a high price sometimes, and these L220s are no exception. They just received new foam, and the veneer looks to be in good shape. They even have the original grilles, although those look a little discolored. If you like JBL, you’d like these for sure, if you’ve got deep enough pockets. The owner is hoping to trade for a travel trailer, or $2200 cash.
3. Vintage LTC100 Loudspeakers
Originally selling for $680 a pair between 1976-1980, these speakers look to come with an interesting bipolar design (similar to some Infinity speakers of the same era) with a rear-firing tweeter along with the compliment of front drivers. They look like they’re in great shape, too. $265 in Marysville, WA.
4. Realistic Mach One Speakers
Realistic, Radio Shack’s house brand before their slow decline and eventual demise, are actually a somewhat underrated speaker. A 3-way design with a large woofer, multicell mid, and horn supertweeter they’re certainly a commanding presence in the room with the multicell tweeter aperture visible above the grille. These look to be in average condition and could certainly use a good cleaning or light refinishing (and maybe a crossover recap by now) but look to be all there. The seller is looking for $175. There’s a review on Audiokarma, too.
5. “Decorator” Klipsch Cornwall Speakers with Crites Upgrades
Klipsch is still one of my favorite speaker brands, and if you’re familiar with them at all then you know about the Cornwalls. The big brother to the Heresy, these feature an extremely efficient (>100 dB 1 W/1 m) 15″ woofer and EV mid-range and tweeter horns. The owner indicates they’ve received Crites upgrades, too. They’re in what I might call “polarizing” mid-century modern style cabinets that could use some touching up, but the seller’s asking price is extremely reasonable for what they are at $850.
6. Early Klipsch Heresy Speakers
Speaking of Klipsch, the Heresy is a fantastic smaller speaker. Originally designed for sound reinforcement in public-address applications back in the day, they’ve been in production for quite a few years, but these early variants are from the ’60s and fully operational on their original components. The seller speculates these use an EV woofer (along with EV tweeters) rather than the Eminence woofer found on some later variants. These early speakers, with the ’60s grille cloth and early emblems, sure do look nice. The seller is asking $650 for the pair.
7. Bose 901 Series I Speakers with Equalizer
For whatever reason, Bose speakers seem to command a real premium that isn’t always well justified, but this seller is right on the money. He’s got a set of Series I speakers with the matching Active Equalizer (necessary for correct sound reproduction) for a spot-on price. The Series I and II used cloth surrounds, too, so there’s nothing that needs to be re-foamed although at the time of posting, the seller wasn’t aware of that fact and listed the surrounds in unknown condition. (The equalizer might need some service though, even if it currently plays – check out Rain City Audio for help with that!) A fantastic deal at $300.
8. BSR Model 158 Speakers
I’m mostly familiar with BSR for their work in turntables, but apparently they’ve made some speakers, too. While I’m not up on the specifics these sure do look interesting with a large woofer, midrange, and something that looks suspiciously like a ribbon or planar tweeter. I haven’t done much research on these, but suspect they’re worth a bit more than the $100 the seller is asking currently, so this might be a real bargain.
9. Knight Floor Speakers
Knight speakers were originally kits back in the day, and like Heathkit speaker kits, there were quite a few versions. Without some more information it’s tough to tell for sure, but some models were more or less University/Altec speakers you put together yourself. Even the more entry level offerings would turn up with Utah and other prized drivers. I bet these are a great bargain no matter their drivers at $30 for the pair, though.
10. Lewis Erath LWE 1 Vintage Speakers
Reported as tri-amp capable speakers in their original condition, these feature the excellent EV T-35 horn tweeter, a 5″ midrange and a 15″ Eminence woofer. They look a bit rough around the edges, but I’d expect performance similar to a Klipsch Cornwall if I were to guess. Certainly worth $200 the seller is asking.
Share this: